
Fig 1 – New Blank Design
Digitizing an Image for Embroidery
Before you begin: Work locally. Always start by moving your file to the desktop. Opening and editing files from a USB (or other) drive can create problems.
1. Open Bernina Embroidery Software and create a new blank design.
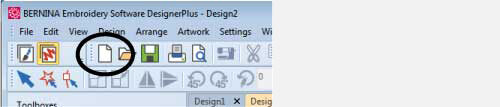
Fig 1 – New Blank Design

Fig 2A – Show Hoop/Settings Icon | Fig 2B – Select a Hoop
Show Hoop/Settings
2. Right click on the “Show Hoop/Settings” icon. Set Machine to Janome MC500E and choose the appropriate hoop size for your design.
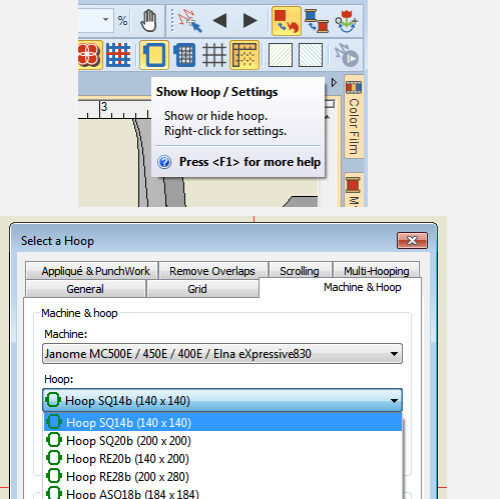
Fig 2A – Show Hoop/Settings Icon | Fig 2B – Select a Hoop

Fig 3 – Resize to Fit the Hoop
Auto-Digitize
3. In the Auto-Digitize toolbox on the left, select Insert Artwork and select your file. For vector art, use an EPS file, for raster images, use a JPEG.
Resize your artwork to the size you want it and to fit within the hoop. Note, the design must fit within the red box inside the hoop.
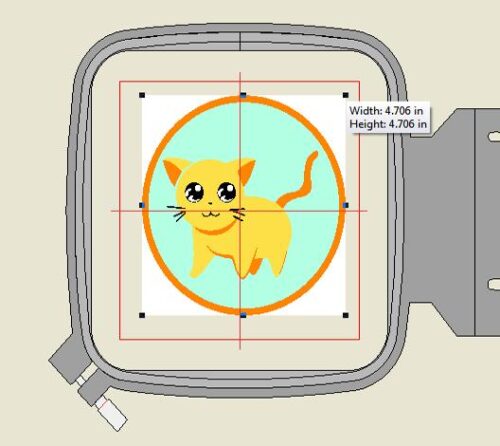
Fig 3 – Resize to Fit the Hoop

Fig 4 – Bitmap Artwork Preparation
Bitmap Artwork Preparation
4. In the Auto-Digitize toolbox, select Auto-Digitize.
In the Bitmap Artwork Preparation screen, set the number of colors to use in the Processed Bitmap section (right side).
Click OK.
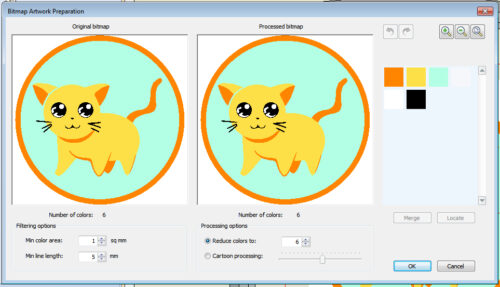
Fig 4 – Bitmap Artwork Preparation

Fig 5 – Thread Charts
Thread Charts
5. In the Auto-Digitize window, select Add Thread Chart Colors to Palette under Matching Method. Click My Thread Charts…
Add (“>”) “art+design” to My Charts and remove (“<”) any other thread charts from the My Charts column.
Click OK.
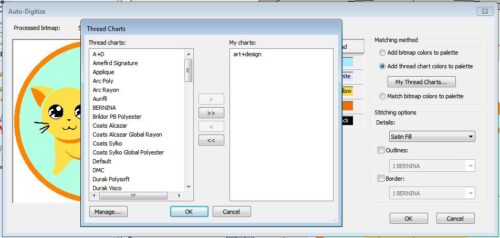
Fig 5 – Thread Charts

Fig 6 – Set Fill Types
Fill Types
6. Set options for each color color used:
Fill – used for large color shapes
Detail – line work, small text, outlines, etc.
Omit – ignores color (eg. ignoring white background of an image)
Click OK.
Once you have digitized your image, you can click on the Bitmaps button in the top toolbar (or use the keyboard shortcut “D”) to hide your original artwork so you can only see your digitized embroidery.
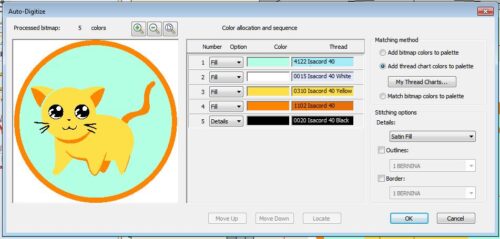
Fig 6 – Set Fill Types

Fig 7 – Raster Auto-Digitizing Examples
Notes for Raster Images
When using Auto-Digitize for raster images, you want to be careful to avoid overly complex images. Complex images, with many tiny sections of color, end up getting broken up into lots of segmented sections of stitching. Each section of stitching requires a knot in the thread at either end of the section. When too many tiny sections stack up in close proximity to one another, the mass of knots can become tangled on the back side of the fabric. This can lead to fabric bunching, thread breaking, and needle breaking.
You can simplify an image by tracing the file in Illustrator, as well as reducing the number of threads used in auto-digitizing.
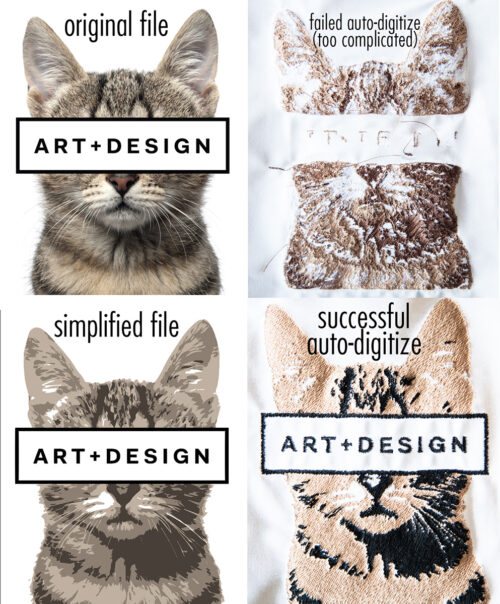
Fig 7 – Raster Auto-Digitizing Examples

Fig 8 – PhotoSnap and Color PhotoStitch Examples
Other Options
For raster images, you have two additional options other than Auto-Digitize.
PhotoSnap will create a single color line-based stitch of your image, using variations in line thickness to denote darker and lighter tones.
Color PhotoStitch will create a multicolor weave of thread to stitch out your image. You can adjust the number of thread colors used similar to Auto-Digitize.
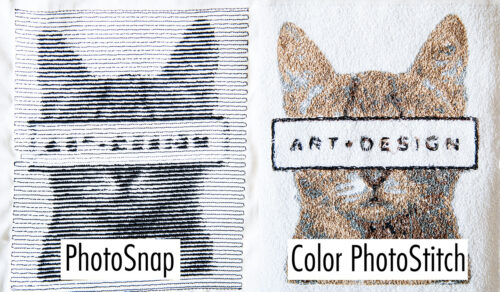
Fig 8 – PhotoSnap and Color PhotoStitch Examples