
Fig 1 – Preparing Fabric
Hooping Fabric for Embroidery
Before hooping your fabric, consult the embroidery stabilizer tutorial for guidance on selecting the correct stabilizer for your project. Select the smallest hoop that will comfortably fit your design.
1. Prepare the fabric and place your selected stablizer beneath it. If you are in need of precise registration of your design on your material, use tailor’s chalk or some other washable fabric marking tool to mark the centerlines for where your design should be placed.
Your fabric and stabilizer should be larger than the hoop size, with at least a two inch margin on all sides (e.g. a 4″x4″ hoop requires at least an 8″x8″ piece of fabric).
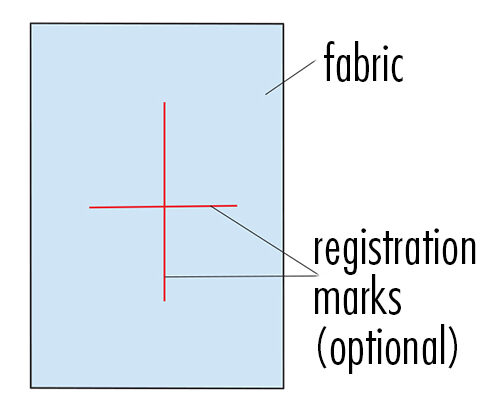
Fig 1 – Preparing Fabric

Fig 2 – Aligning the Hoop
Inner Hoop
2. Lay the inner hoop and template on the fabric. If you drew centerline registration marks, use the plastic template to center the hoop over your marks.
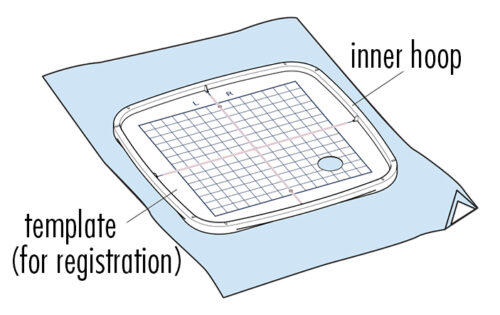
Fig 2 – Aligning the Hoop

Fig 3 – Place Fabric in Outer Hoop
Outer Hoop
3. Loosen the hoop tightening screw on the outer hoop. Place the inner hoop and fabric on the outer hoop.
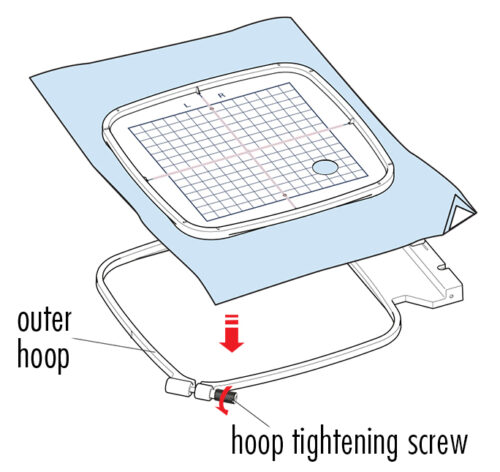
Fig 3 – Place Fabric in Outer Hoop

Fig 4 – Tighten Hoop
Tighten Hoop
4. Push the inner hoop and fabric into the outer hoop. Tighten the screw on the outer hoop to stretch the fabric. Tug on the outer margins of the fabric to make sure that it is stretched tightly within the hoop. If you used a template, remove it.

Fig 4 – Tighten Hoop

Fig 5 – Lock Machine and Raise Presser Foot
Attaching the Hoop to the Machine
5. Press the Lockout key on the machine to prevent accidentally beginning stitching while you are attaching the hoop.
Raise the presser foot using the lever on the back of the machine.

Fig 5 – Lock Machine and Raise Presser Foot

Fig 6 – Attaching the Hoop
Attaching the Hoop
6. Align the notches on the hoop with the Carriage Pins.
Pull the Hoop Release Lever toward you, slide the notches on the hoop onto the the Carriage Pins and release the lever to lock the hoop into place.
Press the Lockout key to unlock the machine when you are finished.
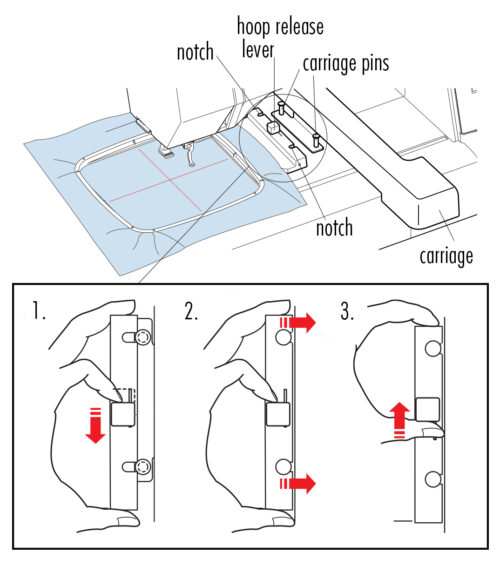
Fig 6 – Attaching the Hoop