Sad Cat
Step 0: Download the Sample File
Before we begin: download the sample Illustrator file here: Sample Illustrator Vector File Download
Open sad-cat.ai in Adobe Illustrator.
This is just a simple 3 color vector illustration of a cat face. This will serve as a basic introduction to prepping a file for embroidery and stitching it.
Save the sample file an EPS file (sad-cat.eps)
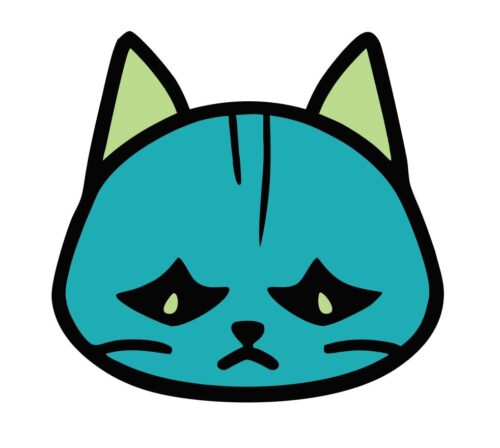
Sad Cat
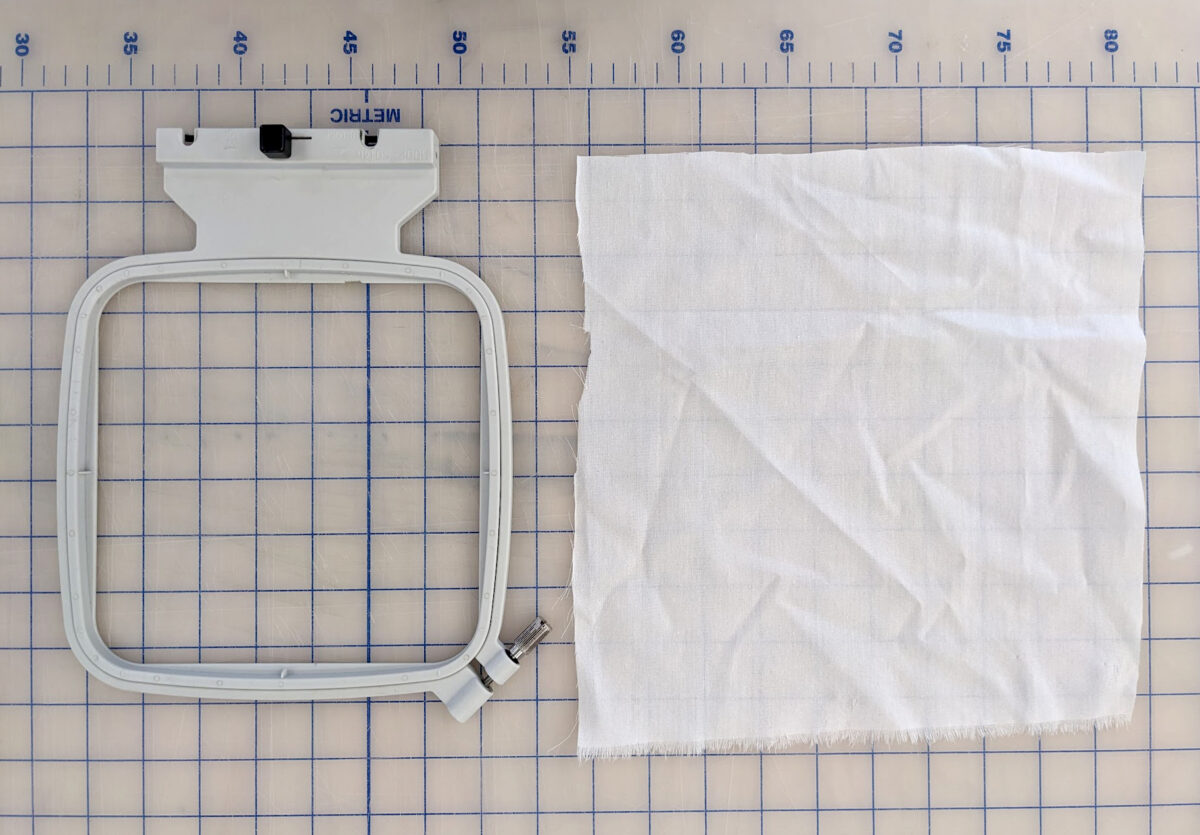
SQ14b Hoop and 10″x10″ Fabric
Supplies
For this project, we will be stitching this image approximately 3″ wide onto a 10″x10″ swatch of white cotton fabric. This will fit onto our smallest (8″x8″) hoop, the SQ14b size.
SQ14b Hoop and 10″x10″ Fabric

New Blank Design
Digitizing an Image for Embroidery
1. Open Bernina Embroidery Software and create a new blank design.

New Blank Design
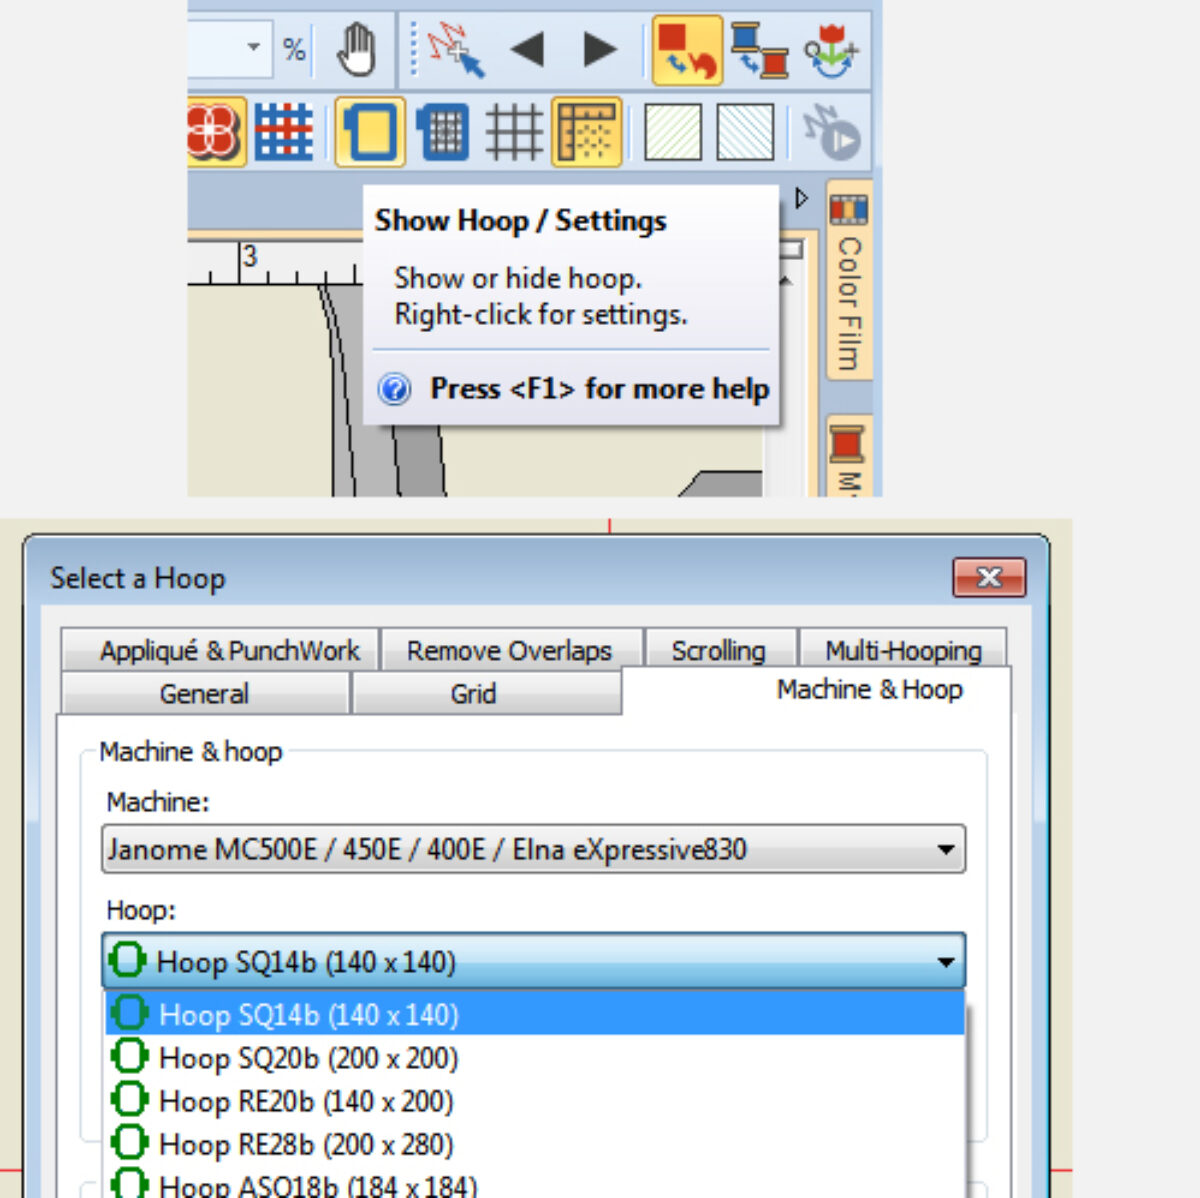
Show Hoop/Settings Icon | Select a Hoop
Show Hoop/Settings
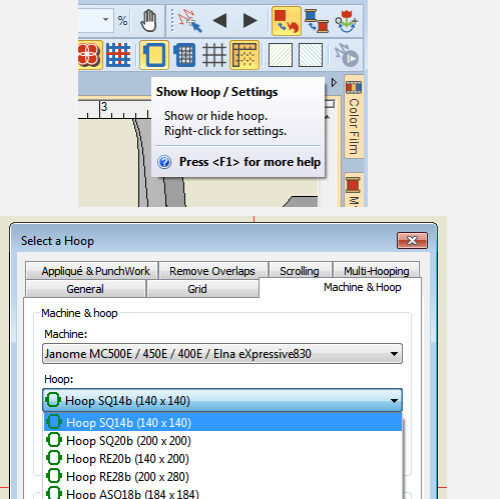
2. Right click on the “Show Hoop/Settings” icon. Set Machine to Janome MC500E and choose Hoop SQ14b (140 x 140).
Show Hoop/Settings Icon | Select a Hoop
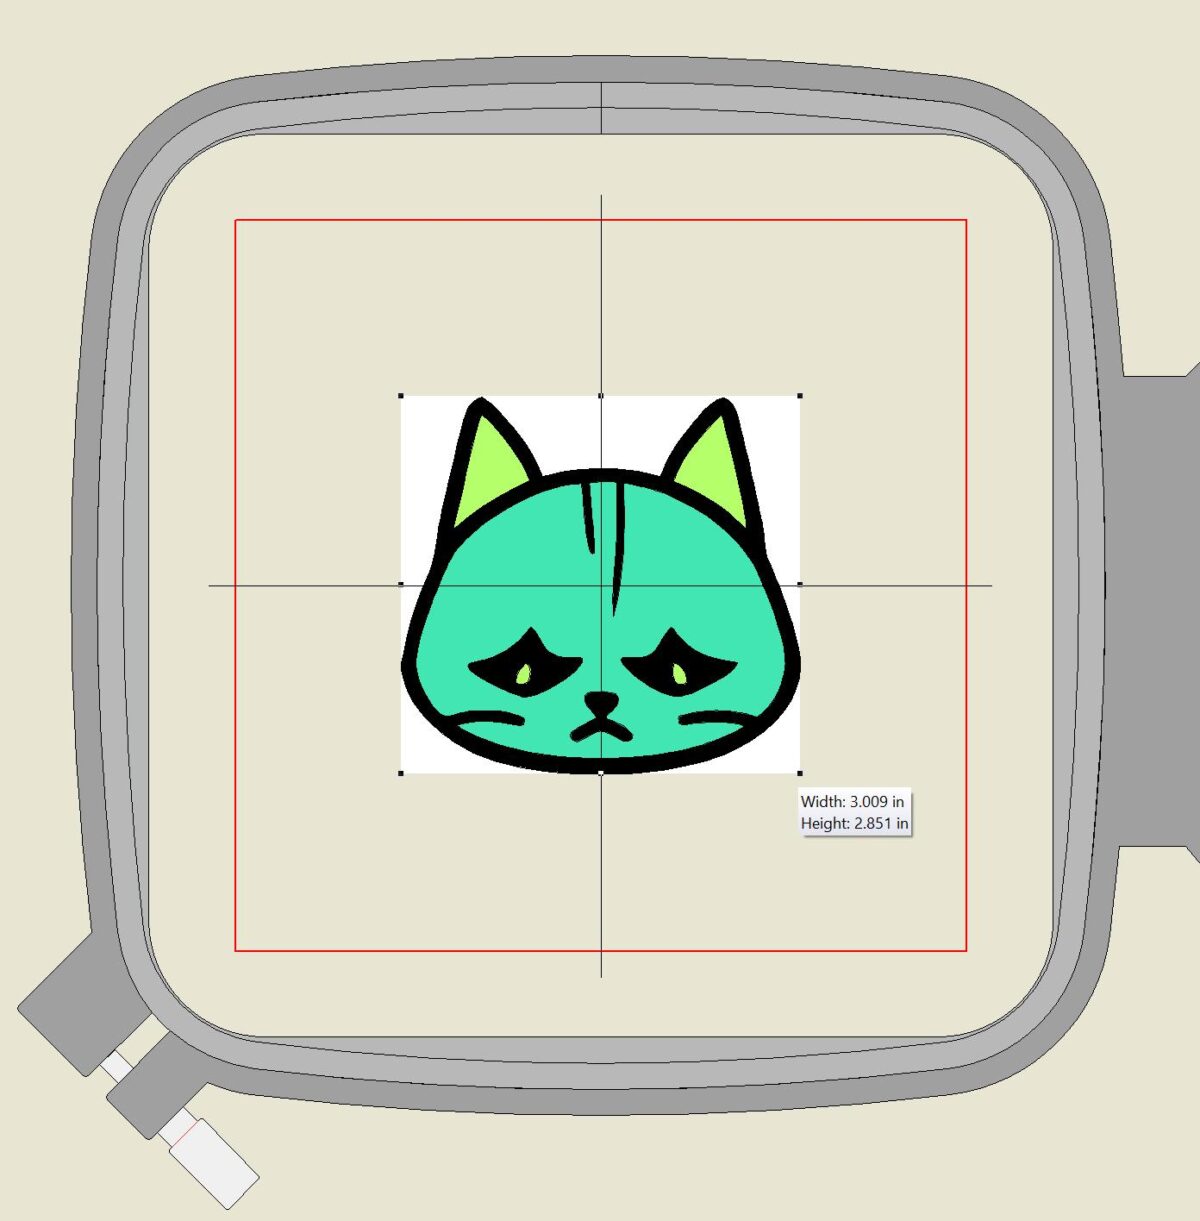
Resize to Fit the Hoop
Auto-Digitize
3. In the Auto-Digitize toolbox on the left, select Insert Artwork and select sad-cat.eps.
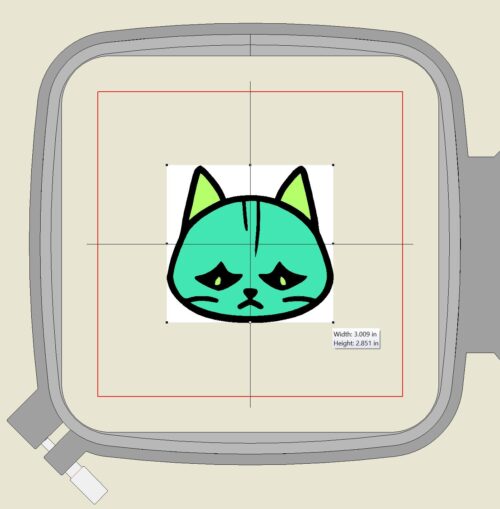
Using the Select Tool (O), select the artwork and use the black boxes on the corner of the artwork to resize the image to be approximately 3″ wide.
After resizing, drag the artwork to that it is centered in the hoop.
Note: if you click on the artwork while it is already selected, the black corner boxes will turn from black to clear. When clear, you can use them to rotate the artwork. Click again to change them back to black to resize.
Resize to Fit the Hoop
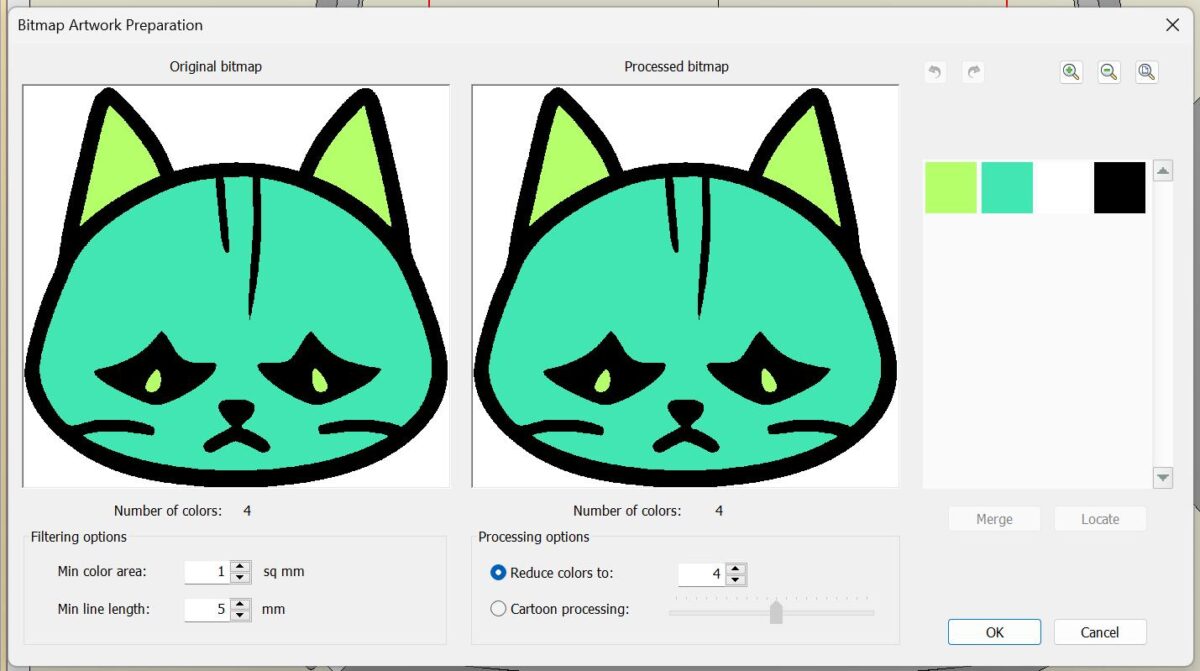
Bitmap Artwork Preparation
Bitmap Artwork Preparation
4. In the Auto-Digitize toolbox, select Auto-Digitize.
In the Bitmap Artwork Preparation screen, under Processing Options, set “Reduce Colors To” to 4.
It should show 4 colors, green, teal, white, and black (we will tell it to ignore the white background in the next step.
Click OK.

Bitmap Artwork Preparation

Thread Charts
Thread Charts
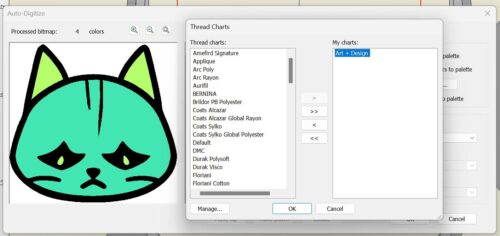
5. In the Auto-Digitize window, select Add Thread Chart Colors to Palette under Matching Method. Click My Thread Charts…
Add (“>”) “Art+Design” to My Charts and remove (“<”) any other thread charts from the My Charts column.
Click OK.
Thread Charts
Set Fill Types
Fill Types
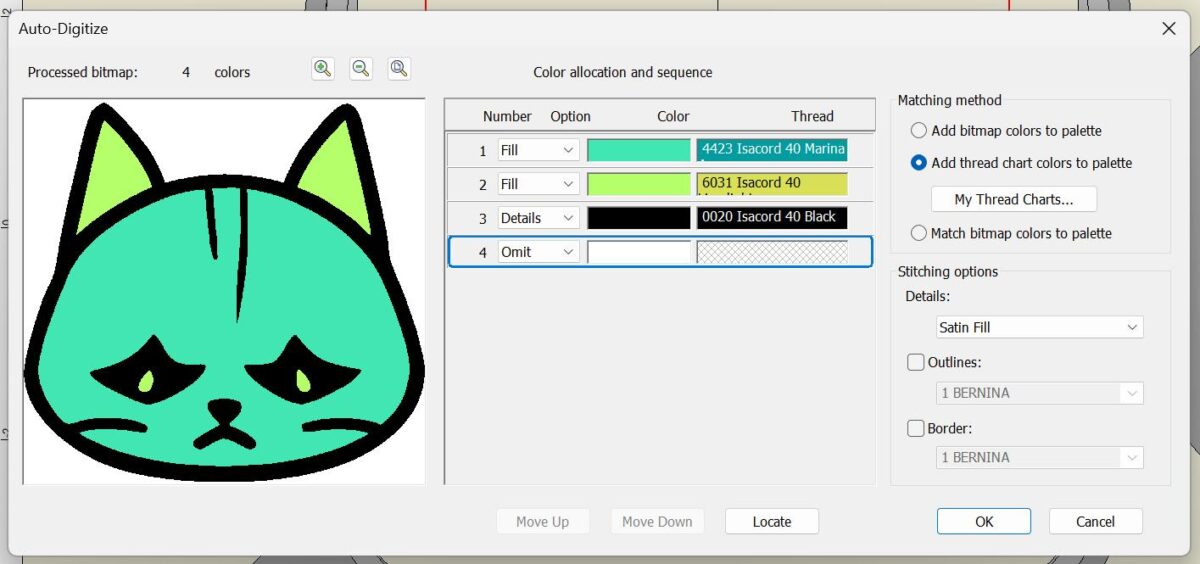
6. Set options for each color color used:
Fill – used for large color shapes
Detail – line work, small text, outlines, etc.
Omit – ignores color (eg. ignoring white background of an image)
Set the green and teal colors to Fill.
Set black to Details.
Set white to Omit.
Click OK.
Set Fill Types
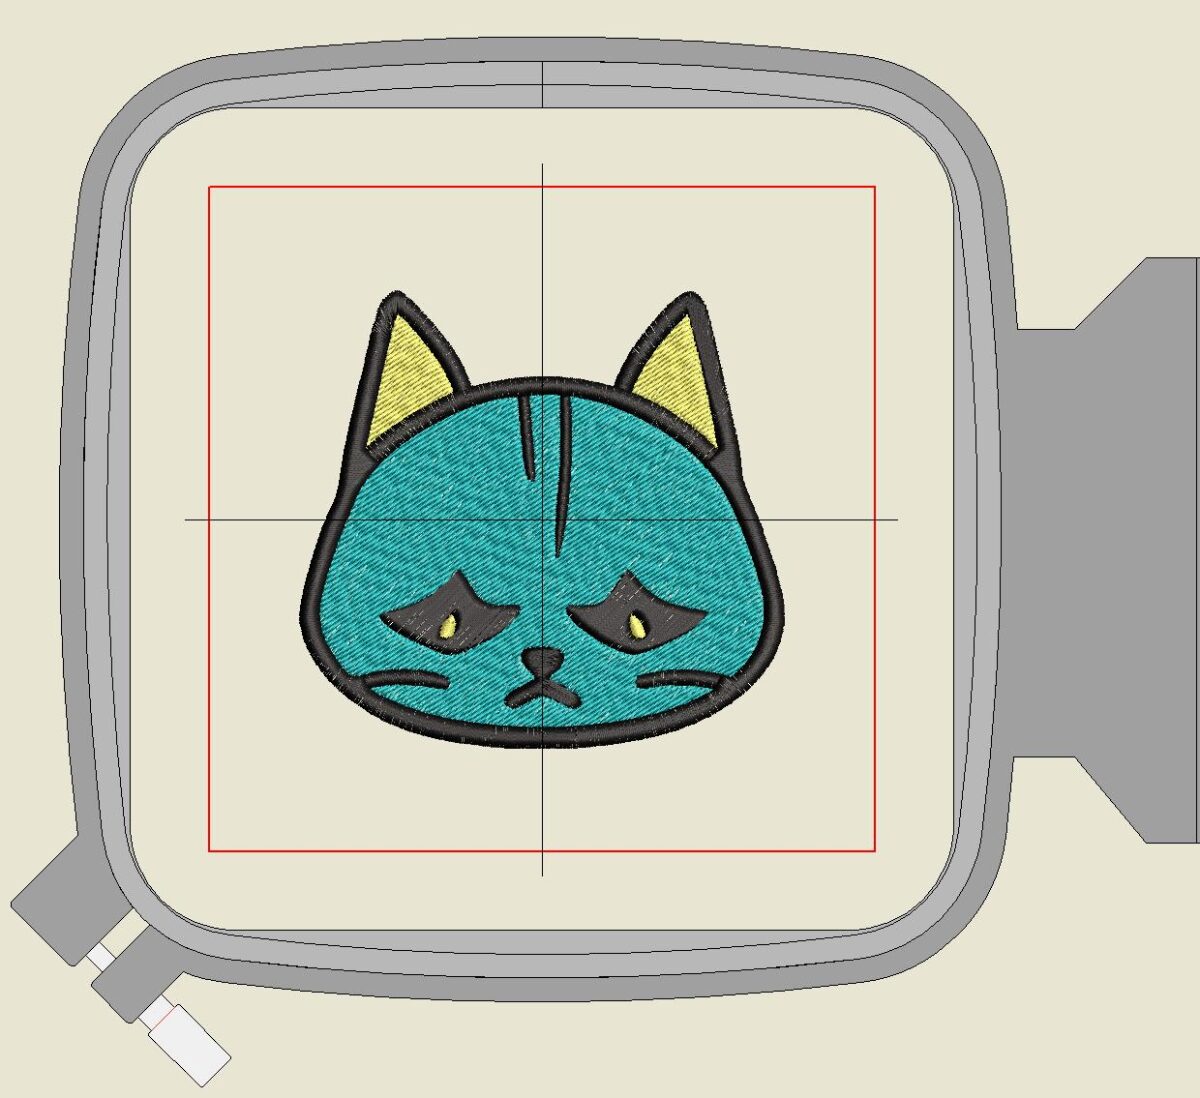
Stitch Pattern Preview
Stitch Preview
7. You have digitized your image!
You can click on the Bitmaps button in the top toolbar (or use the keyboard shortcut “d”) to hide your original artwork so you can only see your digitized embroidery stitch preview.

Stitch Pattern Preview
Pull Compensation
Editing - Pull Compensation
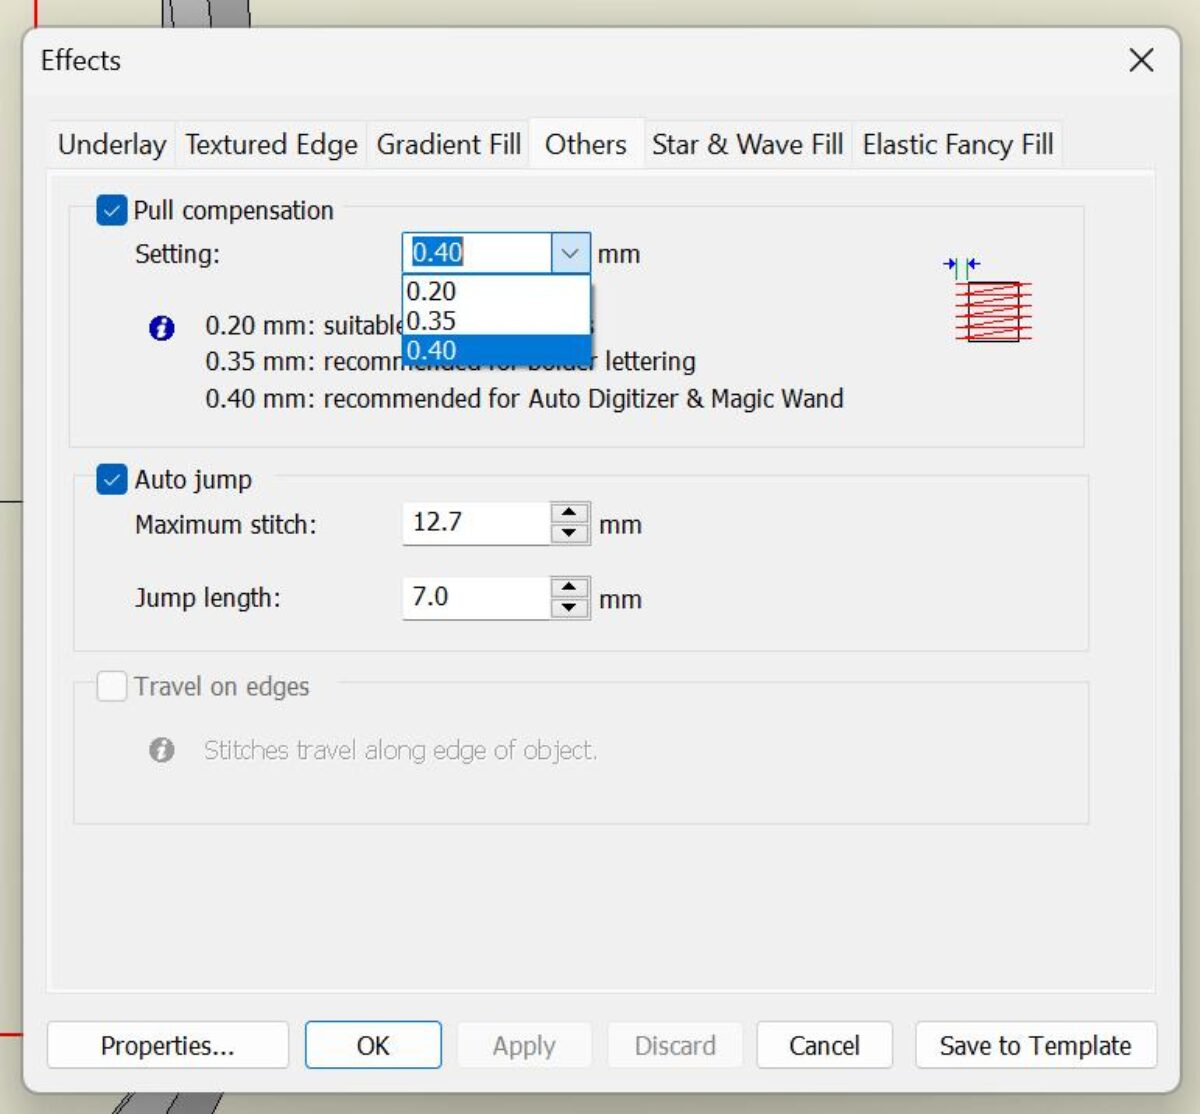
8. The first edit we will make will be to adjust the pull compensation. This will keep gaps from forming between your stitched shapes as the fabric is pulled and stretched during stitching.
Select All (Ctrl-A), navigate to the menu at the top of the screen Settings>Effects and in the Effects pop-up, select the Others tab. Set Pull Compensation to .40mm.
Some small details such as small type or small objects not situated next to other colors may experience a degredation of clarity or quality in this step. You may omit these objects if you prefer. (For our sample project, we do not need to omit any of the shapes)

Pull Compensation
Fill Type
Editing - Fill Types
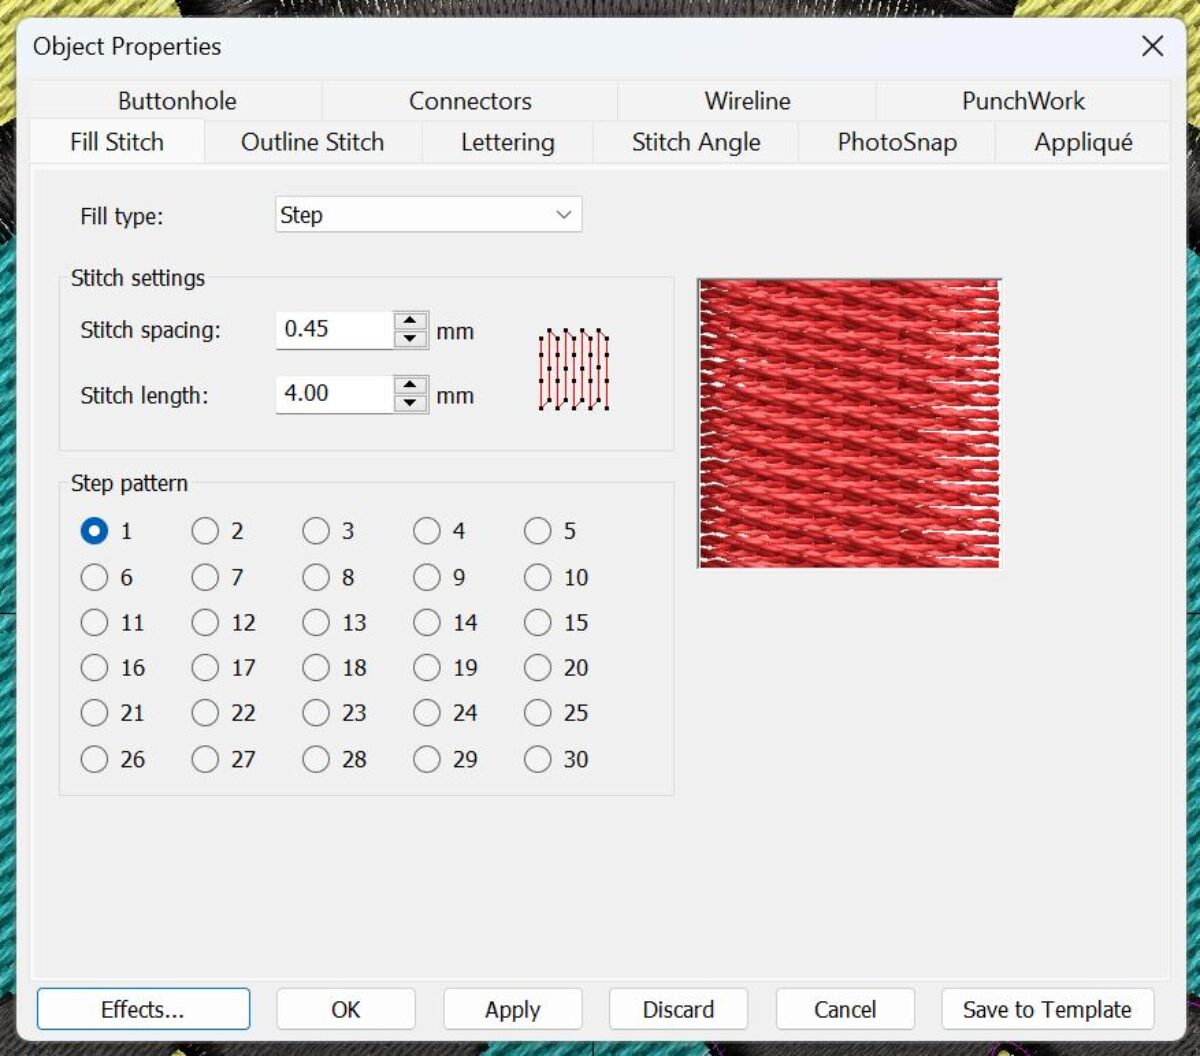
9. Because we selected Detail for our black shapes, the software has set all of those shapes to use a satin stitch. A satin stitch consists of many parallel stitches next to each other in a row. This produces a smooth shape and works well for small shapes and lines.
Satin stitches only work over short distances, so they are not suitable for use on larger objects.
As a result, we need to change the fill type for the cat’s eyes to be a Step Stitch instead of a Satin Stitch.
Right click on one of the eyes and select Object Properties, then the Fill Stitch tab. Set the fill type to Step. (You can select many different patterns of Step stitches to create different textures, but for this project we will leave Step Pattern 1 selected).
Click OK.
Repeat this process for the other eye and the mouth/nose.

Fill Type
Fill Type
Editing - Stitch Angles
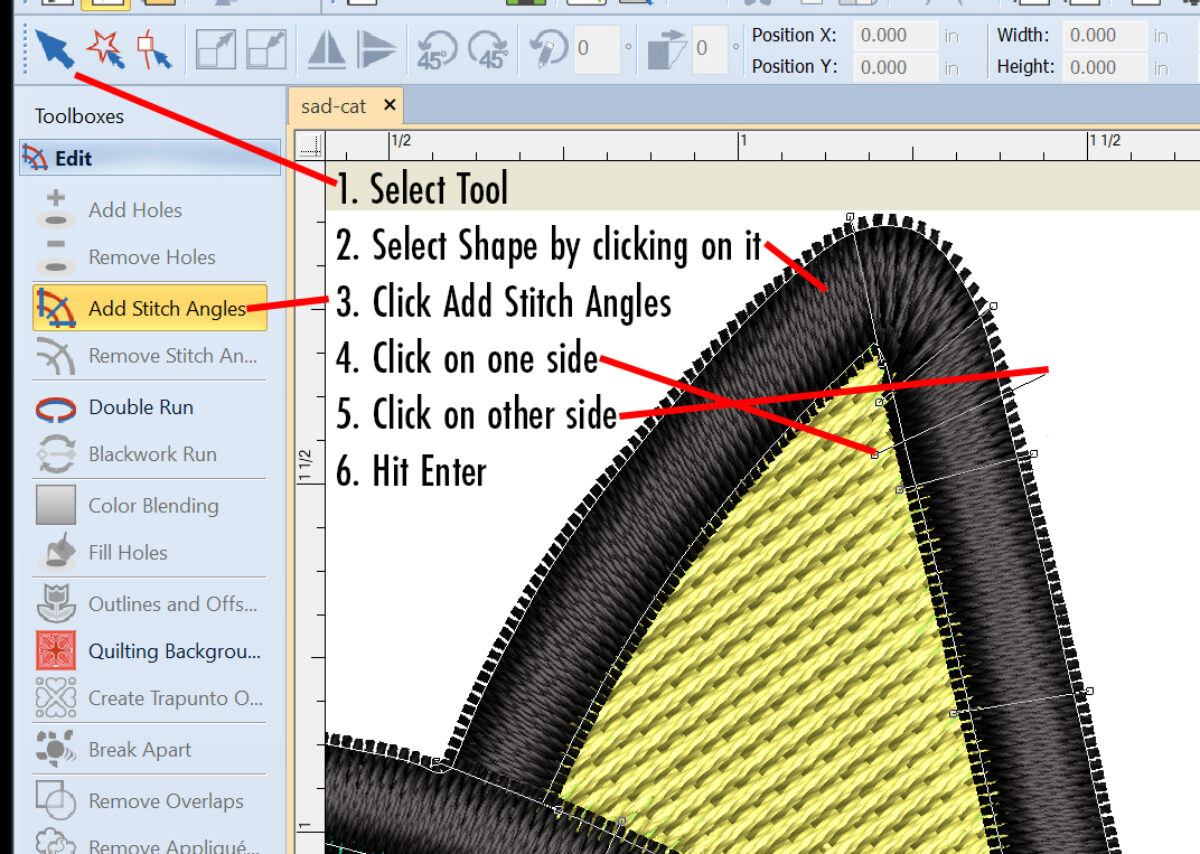
10. If you have an outline shape that is set to satin stitch, like we do in this file, it is a good idea to take a close look at the angle of the stitches. We want the satin stitch lines to run perpindicular to the outline. In some areas, such as around the points of the ears on the cat, the angle of the satin stitches will rotate around the curving line and can sometimes get off to the point where you have very long stretches of stitches close to parallel with the line. This can cause problems since (as previously mentioned) satin stitches only work over short distances.
Take a quick look around the black outline. If you see any areas where the direction of the satin stitch gets too far off from being perpindicular to the outline, we can add in a stitch angle adjustment to correct it.
To add a stitch angle adjustment, first select the black outline object using the Object Selector tool.
Next, in the Edit Panel on the left, select “Add Stitch Angle”.
Click on one side of the outline where you want to fix the angle, then stretch the line across the outline to the other side and click again.
Hit enter.
Repeat this process to add more angle adjustments if needed.

Fill Type
Saving Your File to the USB Stick
Saving Your File
11. There are a lot more potential edits that COULD be done to your design. For more details on how to edit embroidery designs see our page on Editing a Digitized Embroidery File. But for this project, we now have a stitch-able design and need to save it and transfer it to the machine.
First go to File > Save and save your project. This will create a .ART80 file that you will be able to reopen later in Bernina if you need to go back and make changes.
Next we need to export a file that the embroidery machine itself can read. Go to File > Export Machine File and save your design as a Tajima (*.DST) file. We will save this as sad-cat.dst to our desktop.
Take the USB stick out of the right side of the embroidery machine and plug it into the PC.
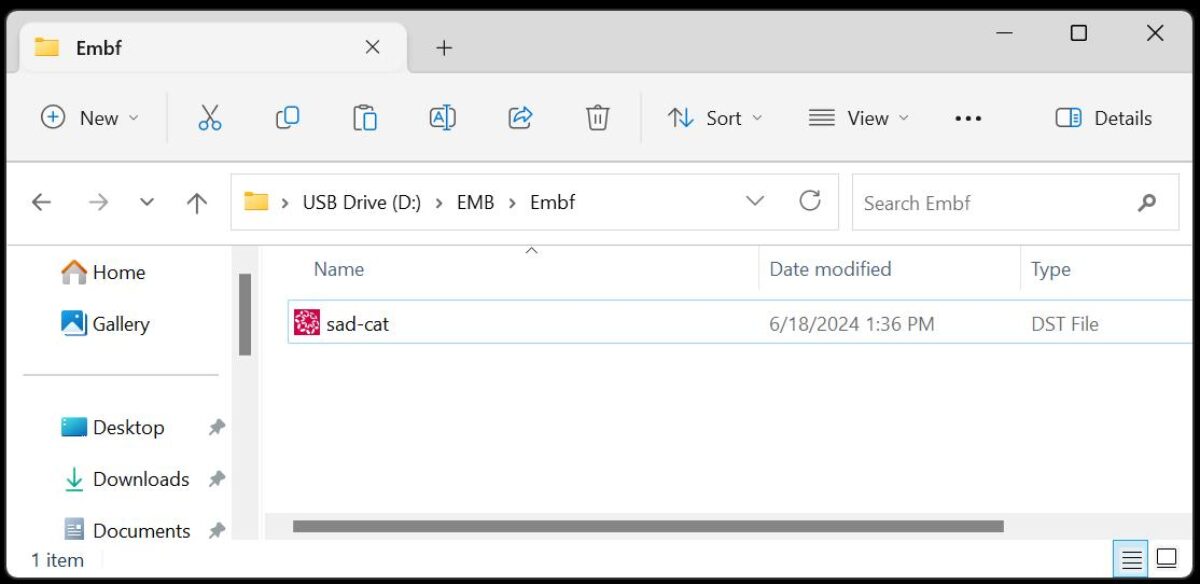
Open the USB stick in File Explorer and copy sad-cat.dst from your desktop to USB Drive > EMB > Embf (your file should be inside the Embf folder).
Saving Your File to the USB Stick

Loading Your File on the Embroidery Machine
Loading Your File on the Embroidery Machine
12. Eject the USB stick from the PC and put it back in the embroidery machine. Turn the machine on using the black power switch on the right side.
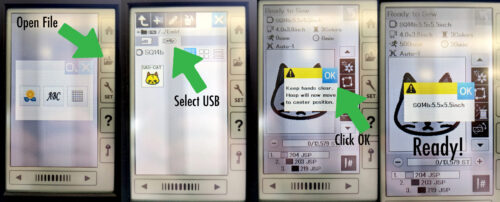
Press the Open File button next to the LCD screen (the button with the file folder with arrow icon).
Select the USB stick tab. You should see your file (the colors of your thread will look incorrect, that is ok).
Select your file. You will get a pop-up warning you to keep your hands clear as the hoop will be moving to a centered position. Click OK, the mount for the hoop will center itself on the machine.
Finally, the machine will tell you what hoop size your file is formatted for, in this case, SQ14b. Click OK.
You are now ready to hoop your fabric, load your bobbin, and load your hoop on the machine!
Loading Your File on the Embroidery Machine
Aligning the Hoop
Hooping Your Fabric
13. Cut off two 10″ x 10″ sheets of tearaway stabilizer (on rolls on the desk next to the embroidery computer). For more details on why you would use different types of stabilizer see our guide on Choosing an Embroidery Stabilizer.
Place the sheets of stabilizer underneath your fabric.
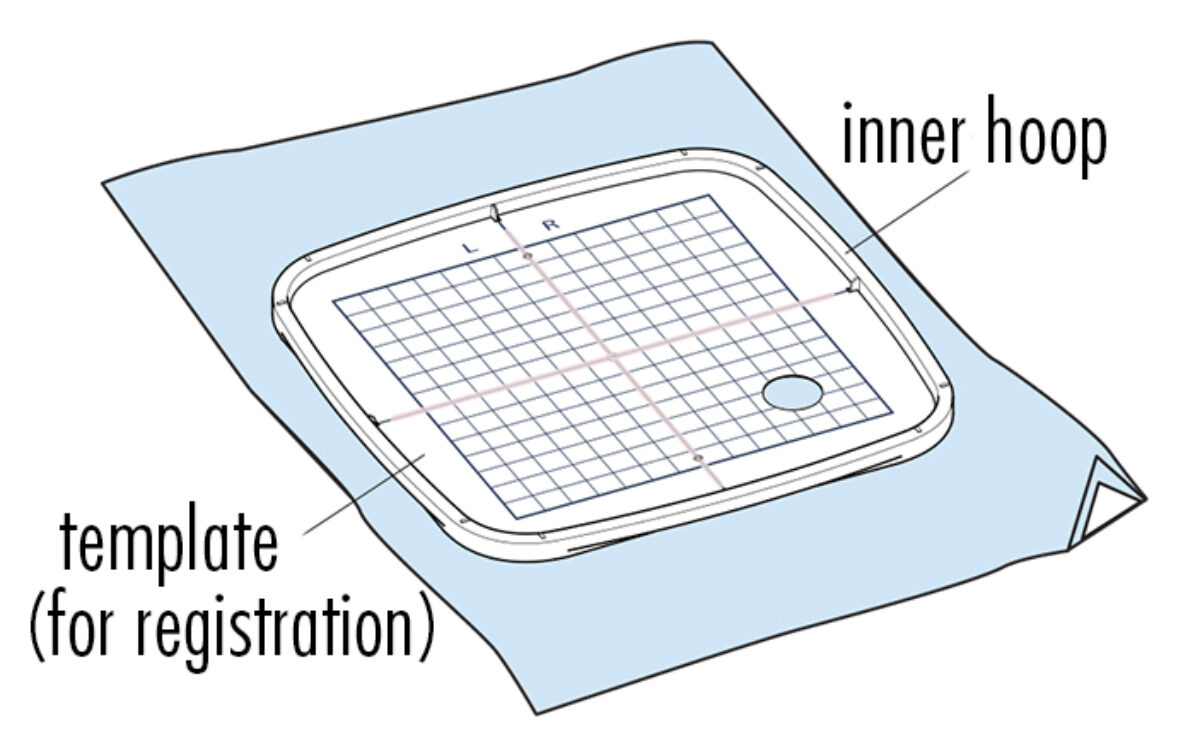
Lay the inner hoop, centered, on top of the fabric/stabilizer stack (you can ignore the template in this case as we are not attempting to precisely align our design on our fabric).

Aligning the Hoop
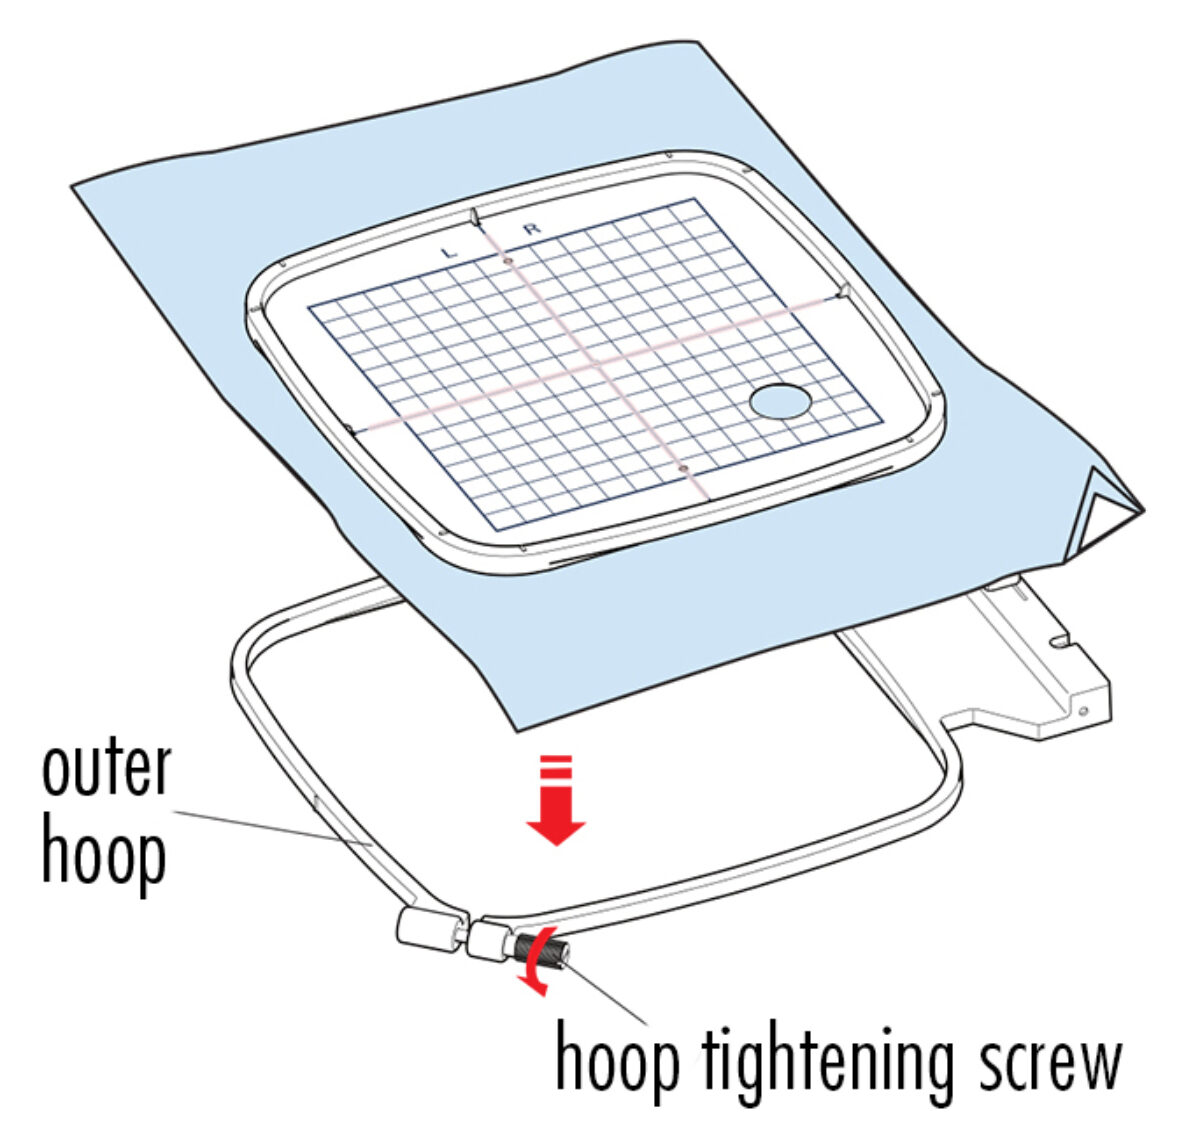
Place Fabric in Outer Hoop
Hooping Your Fabric 2
14. Loosen the hoop tightening screw on the outer hoop. Place the inner hoop and fabric/stabilizer on the outer hoop.

Place Fabric in Outer Hoop
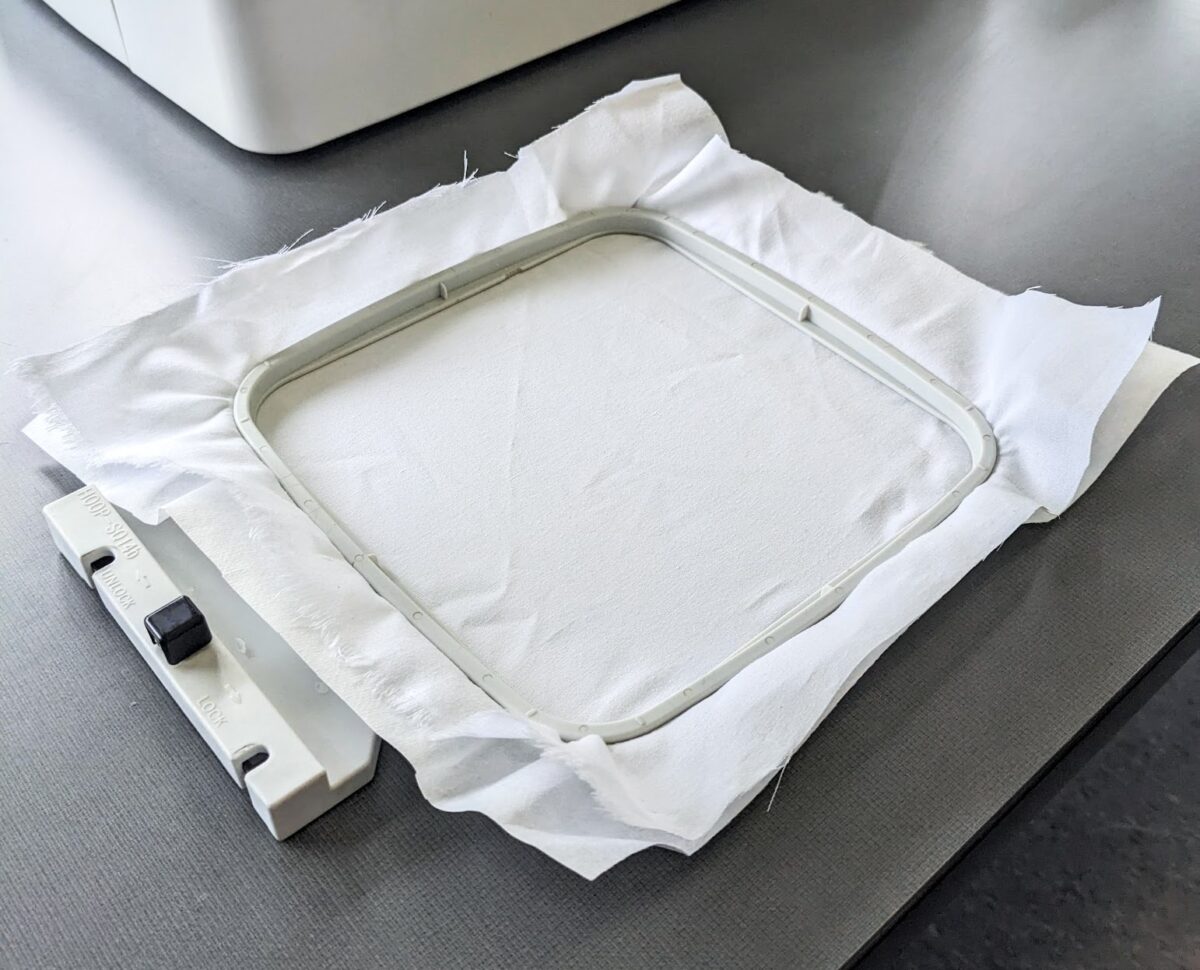
Fabric and Stabilizer Hooped and Ready to Stitch
Hooping Your Fabric 3
15. Push the inner hoop and fabric into the outer hoop. Tighten the screw on the outer hoop to stretch the fabric. Tug on the outer margins of the fabric to make sure that it is stretched tightly within the hoop.
Fabric and Stabilizer Hooped and Ready to Stitch
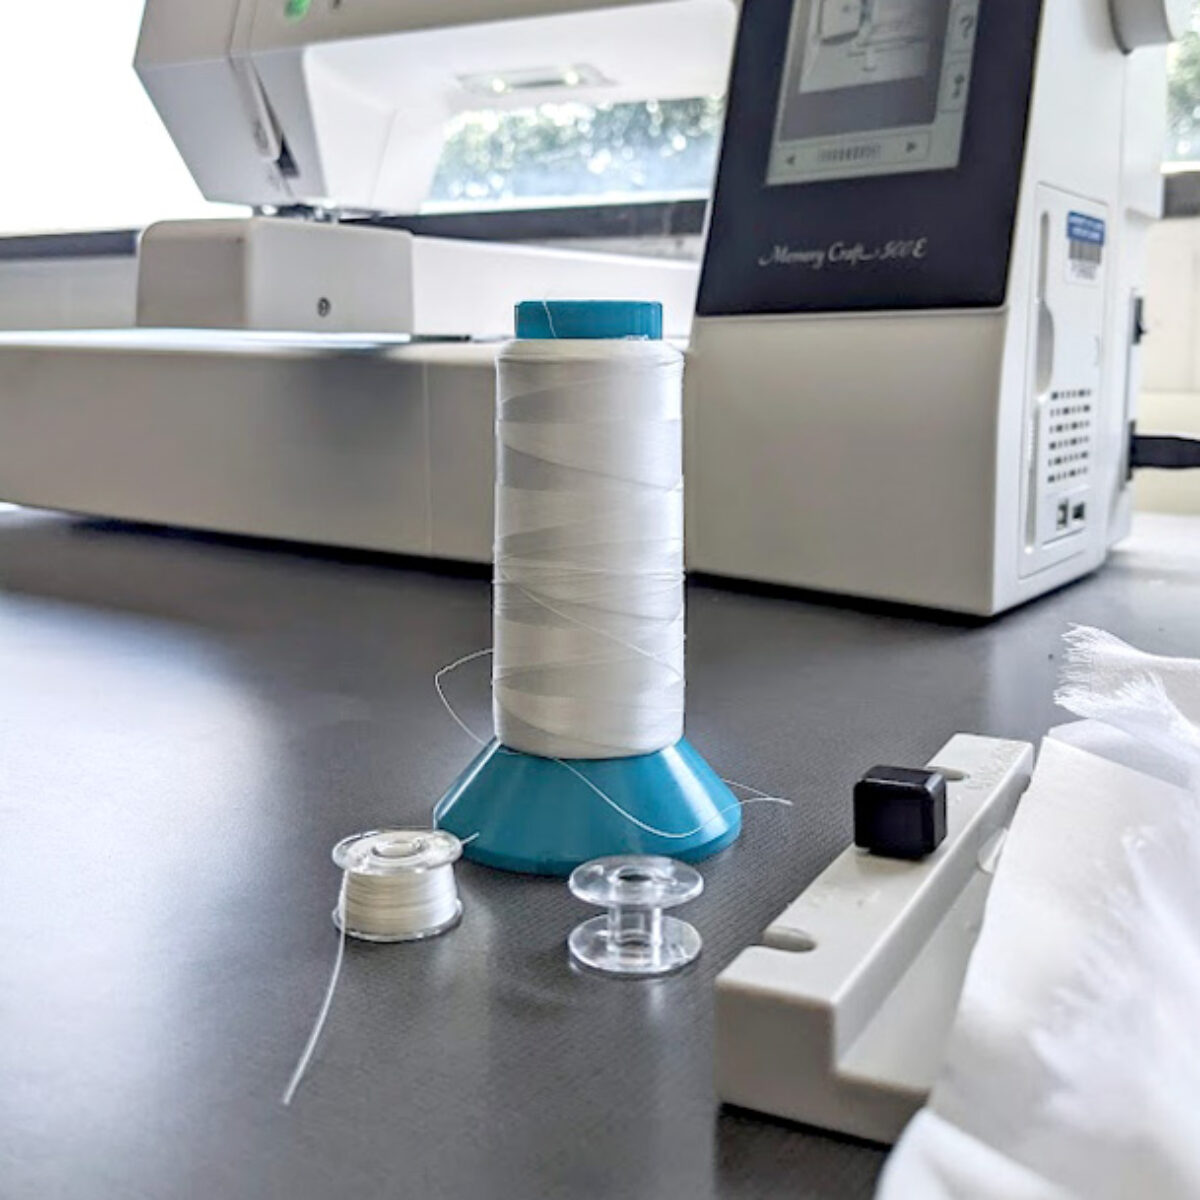
Bobbin Thread
Loading the Bobbin
16. Follow the instructions on pages 8-10 of the Embroidery Machine Manual (in the black tutorial binder or online here) for winding and inserting the bobbin.
You can also access on-machine help instructions for bobbin winding and other basic functions of the machine by pressing the ? button next to the LCD screen. Follow “Winding the Bobbin” and “Inserting the bobbin”.
For this project, just use the white bobbin thread on the large spool to load the bobbin. Only use the provided clear plastic Janome bobbins. If no bobbins are available in the accessory box, as the lab assistant at the Checkout Window for one.
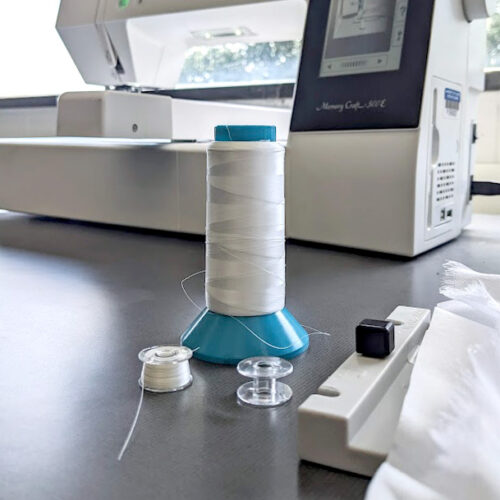
Bobbin Thread

Loading the Hoop
Loading the Hoop
17. Raise the presser foot using the lever on the back of the machine directly behind the needle.
Place the hoop on the machine. Pull the black tab on the hoop connector towards you and push the hoop onto the mounting posts.
Release the black tab and ensure that the hoop is securely mounted.
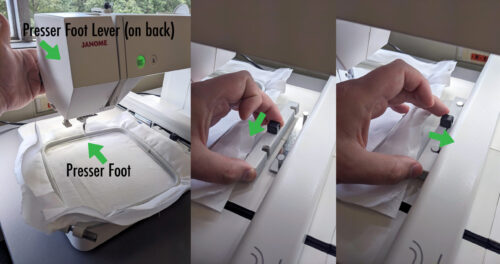
Loading the Hoop

Threading the Machine
Loading Your First Thread Color
18. Follow the instructions on pages 11 of the Embroidery Machine Manual (in the black tutorial binder or online here) for winding and inserting the bobbin.
You can also access on-machine help instructions for bobbin winding and other basic functions of the machine by pressing the ? button next to the LCD screen. Follow “Threading the Machine”.
Note: the color previews for your threads on the machine will be incorrect. Be sure to load the correct color of thread that matches your color choice in your file on the PC. In this case, we will be loading 4423 Marina Aqua first.
Place the spool lock on the spool holder to keep the spool from falling off.
Lower the presser foot.
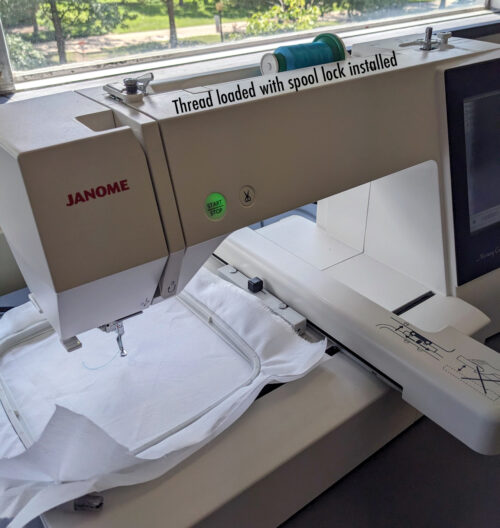
Threading the Machine

Trimming thread after stitching
Stitch the First Color
19. Press the Green Start/Stop button on the machine. It will begin stitching your design!
Some common errors that may occur while stitching are that the thread may break or the bobbin may run out of thread. In these cases, follow the instructions given on the screen, they can usually be resolved by rethreading the machine or reloading the bobbin.
If you need to pause the stitching at any time, press the Start/Stop button again.
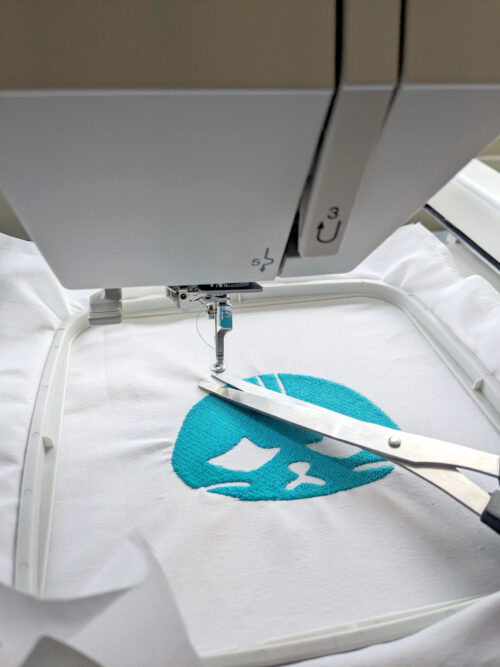
Trimming thread after stitching
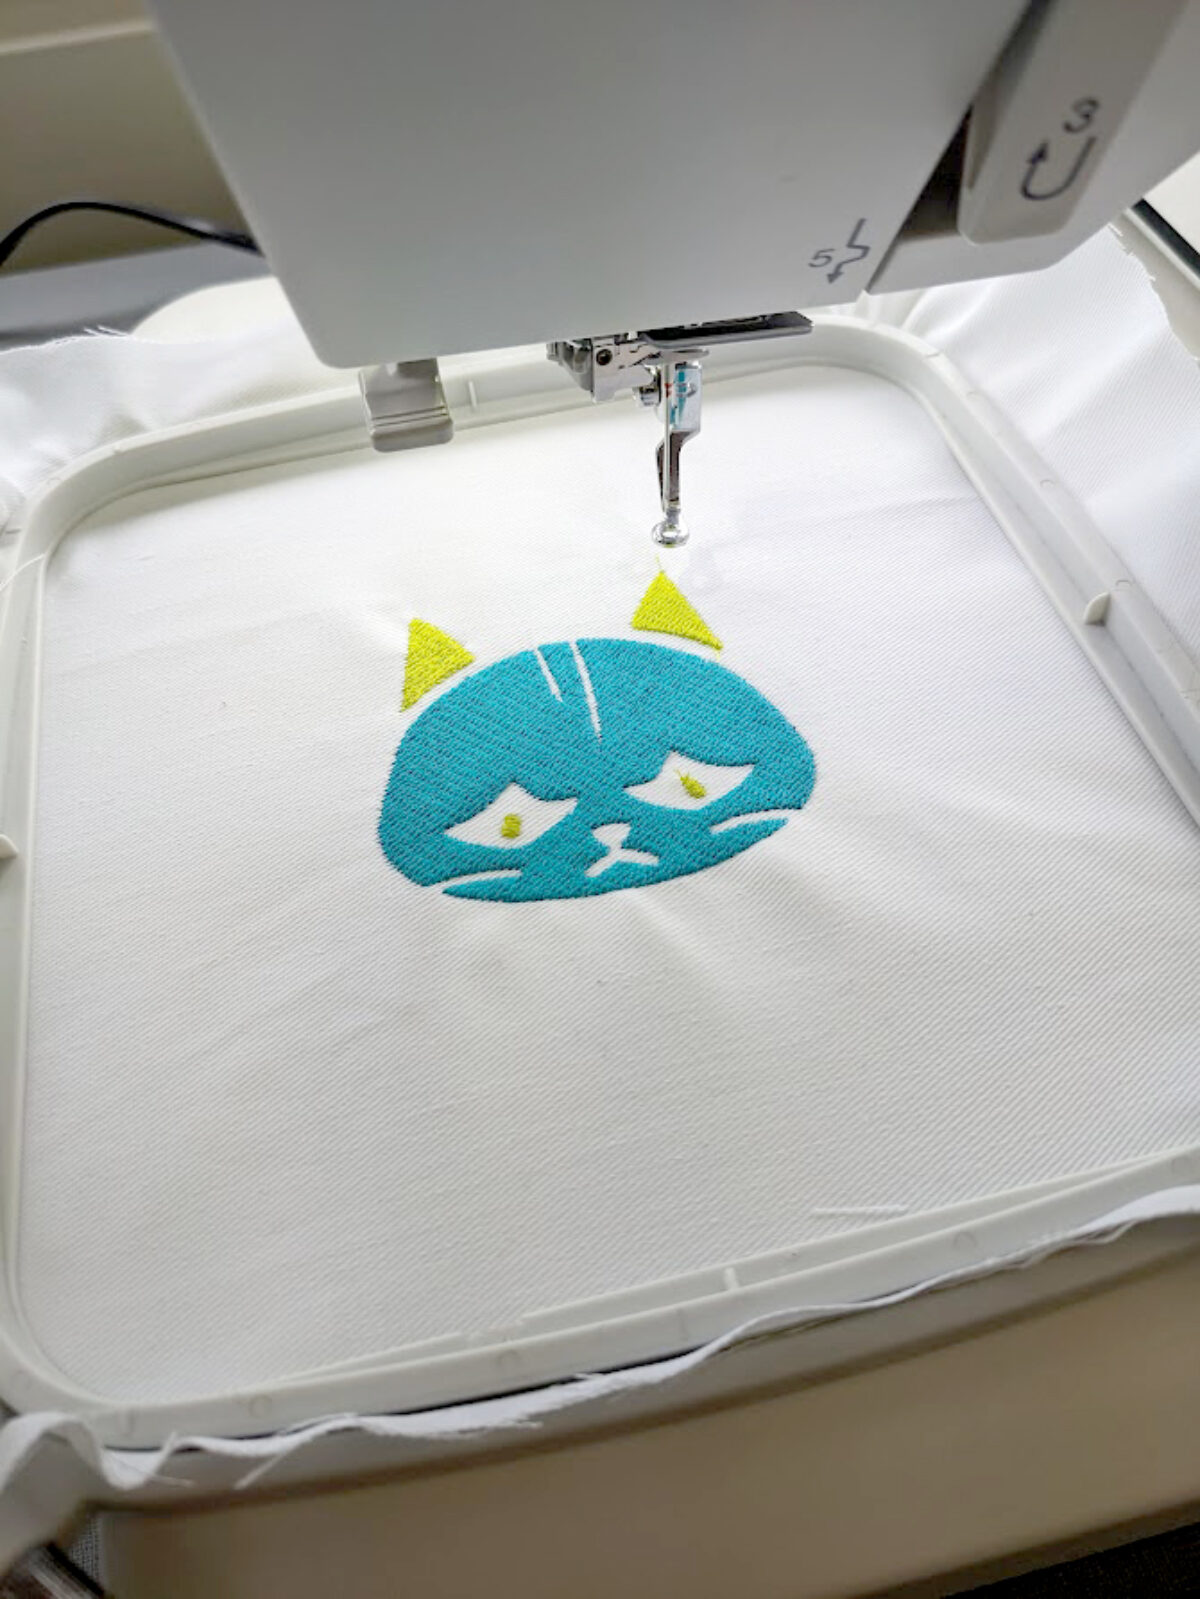
Two colors done
Stitch the Second Color
20. The machine will stop when it finishes your first color and prompt you to raise the presser foot and load the next.
Use scissors to cut the thread off near the surface of the fabric then remove the first color thread and thread the machine with the next one. Our next color for this project will be 6031 Limelight.
When your second color is threaded, press Start/Stop to begin.

Two colors done
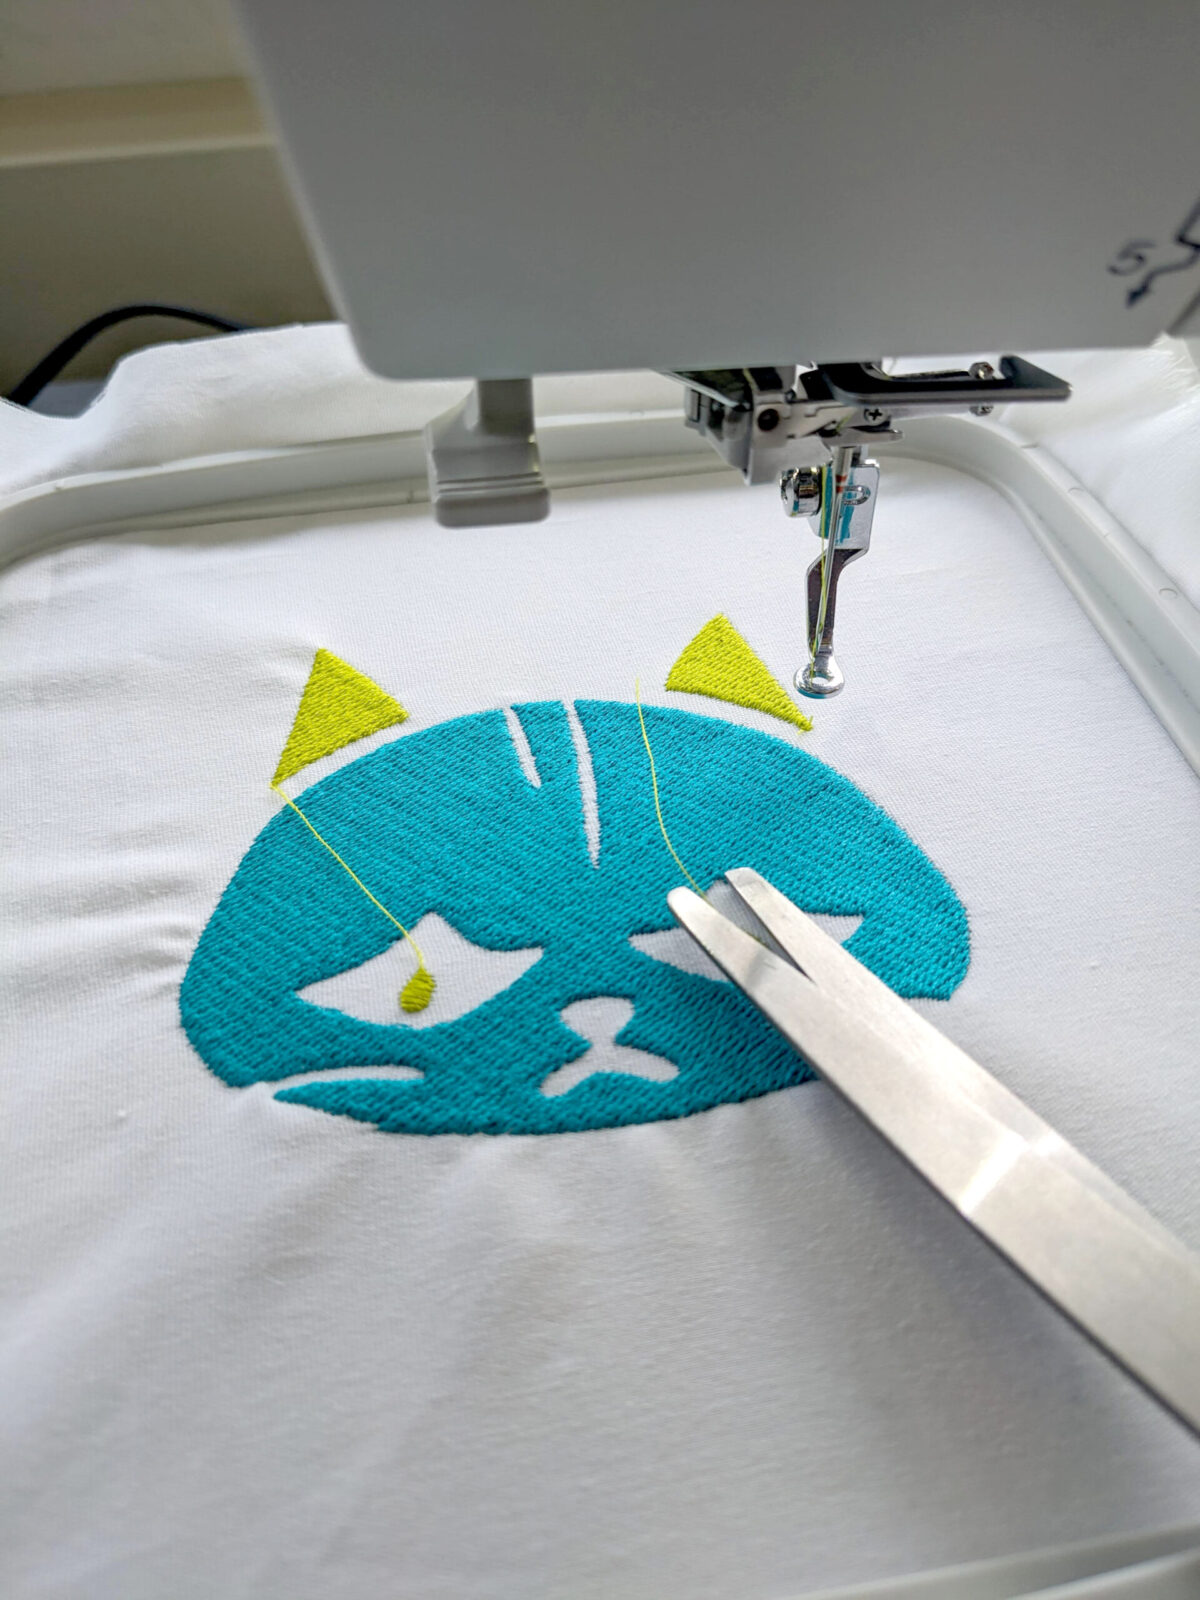
Trimming thread tails
Stitch the Second Color
Note: Sometimes, when moving between shapes, the machine will leave a tail of thread between the shapes. You can pause the machine using the Start/Stop button (or wait until the machine stops between thread colors) and use scissors to trim these tails off near the surface.
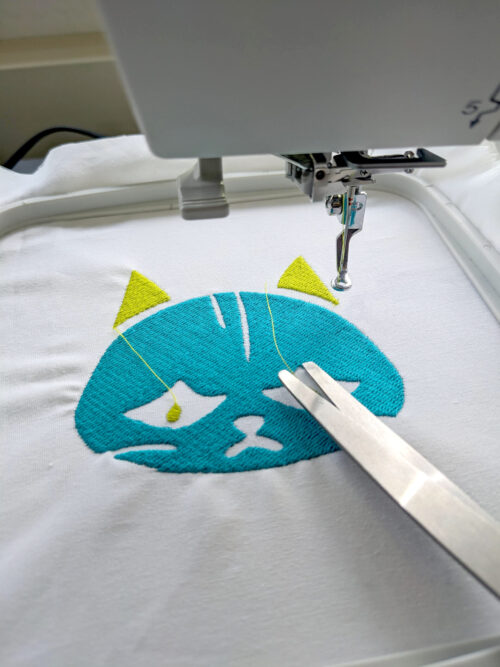
Trimming thread tails
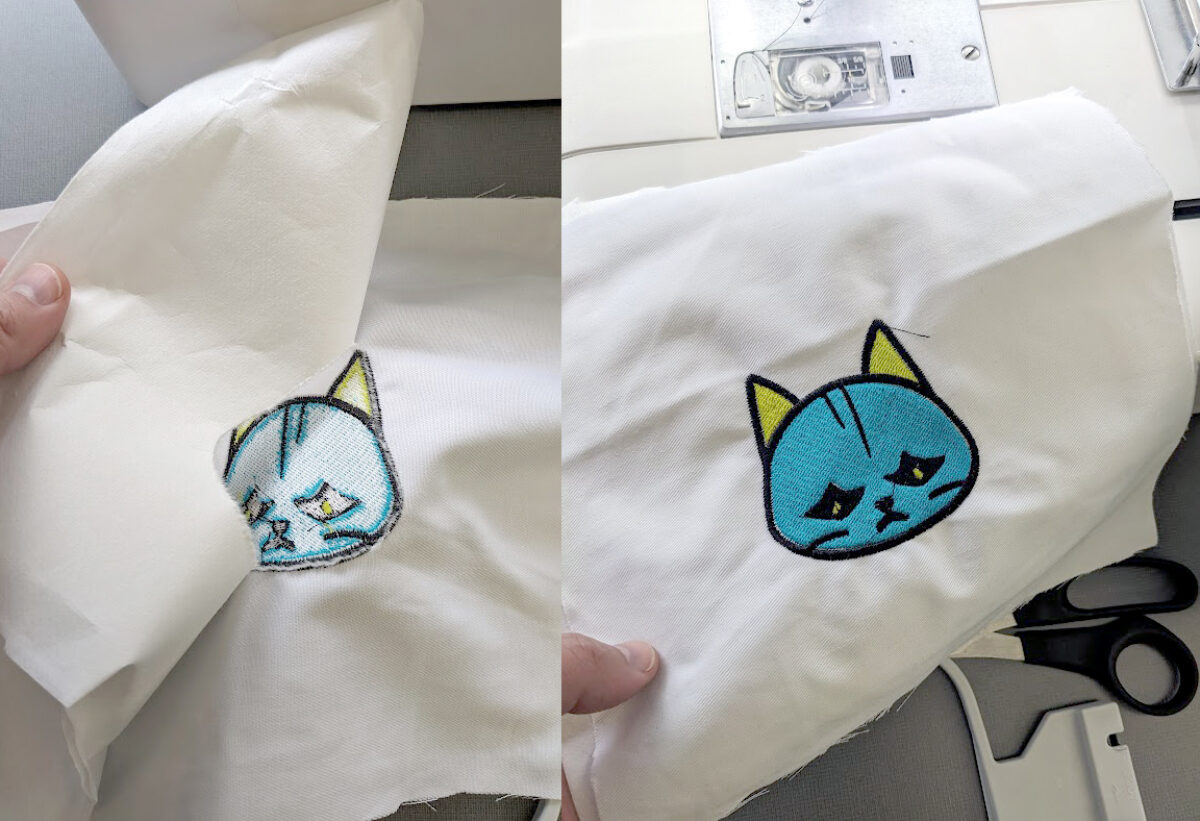
Completed design!
Stitch the Last Color
21. After the second color is done. Load the 0020 black thread. Press Start/Stop to begin.
When the stitching is complete, remove the hoop from the machine and remove your fabric from the hoop.
Tear the stabilizer away from the back of your fabric. It should tear easily around your design.
You are done! Congratulations!
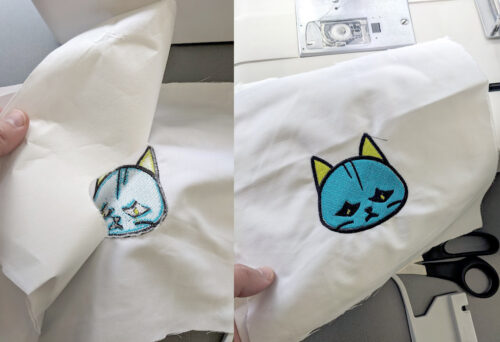
Completed design!