
Operating Classroom AV-Lite
For classroom AV-lite setups, you can connect to the projector using the classroom the Laptop HDMI cable, or wirelessly using the Apple TV. Some AV-lite setups also have a Document Camera. Jump to the section that describes how you you wish to connect, and follow the step-by-step instructions.

Connecting using the Laptop HDMI
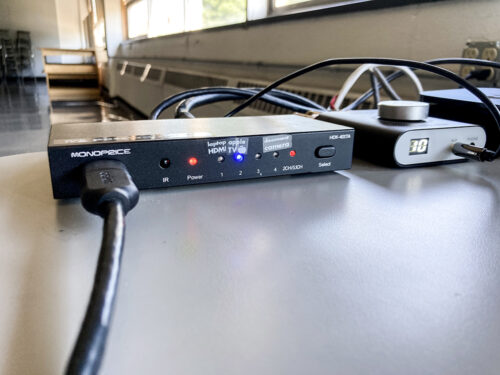
2. Select Laptop HDMI on the AV switch
3. Connect your laptop to the Laptop HDMI cable. Cable adapters are available at the Checkout Window
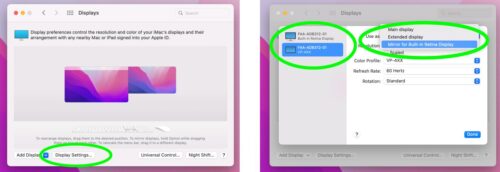
- Troubleshooting tip: if you are using a Mac and getting an “extended desktop” on the projector screen, you may need to “mirror” your displays. To change your display settings in macOS Monterey (12.0+), go to > System Preferences > Displays > Display Settings > Choose the external display (labeled VP-XXX) and under Use as, choose “Mirror for Built in Retina Display”
- (For macOS Catalina/Big Sur (10.15+) go to > System Preferences > Displays > Arrangement > Mirror Displays)
4. Please turn off the projector when you are finished. Note: Some of the projectors have separate On and Standby buttons instead of a single On/Off button.

Connecting using the Apple TV
2. Select Apple TV on the AV switch
3. Connect your Mac to the IllinoisNet network.
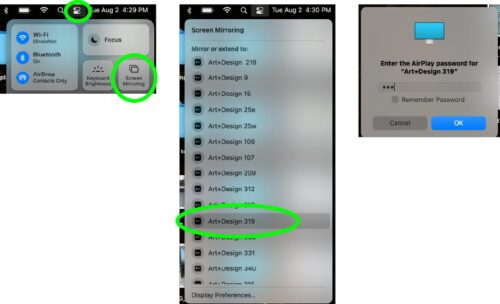
4. Navigate to the Control Center icon in the Menu Bar. Select Screen Mirroring. The Apple TV is named with the 3-digit room number, and the password is the 3-digit room number
5. Please turn off the projector when you are finished. Note: Some of the projectors have separate On and Standby buttons instead of a single On/Off button.

Connecting using the Document Camera
2. Select Document Camera on the AV switch
3. Turn on the power on the base of the Document Camera (the power switch on the head is just for the light), and make sure that the source is set to the camera (not computer).
4. Put objects/drawings/etc. under the lens of the Document Camera. It should auto-focus, but if it doesn’t, press the focus button.
5. Please turn off the projector when you are finished. Note: Some of the projectors have separate On and Standby buttons instead of a single On/Off button.

Troubleshooting
No Audio?
Set audio output: System Preferences > Sound > Output
Make sure the amp is turned on and volume is turned up
- if you are using the your laptop, make sure the audio output is set to go over HDMI
- if you are using Apple TV: Set audio output to selected Apple TV
What I see on the projector is not what I see on my screen…
Check your display settings. System Preferences > Displays > Arrangement > Mirror Displays