
Fig 1 – Printer Selection
Preparing 3D Print Files for the Zortrax Printers
Before you begin: Work locally. Always start by moving your file to the desktop. Opening and printing files from a USB (or other) drive can create problems.
1. The software that prepares models for 3D printing on the Zortrax printers is called Z-Suite. Open Z-Suite and click “Continue without logging in – Start Now”. Select the type of printer that you will be using – the M200 Plus. (Note: on Macs the software may take a minute to load.)
(You may use any 3D modeling software that you are comfortable using to create your file, as long as you are able to output it as an .stl.)
2. Open your .stl file in Z-Suite, by navigating to the “+” symbol on the left navigation bar, and then to your saved .stl. (Note: large .stl files may take several minutes to load.)
Be sure you are formatting your file for the Zortrax M200 Plus. The dropdown menu in the lower left-hand corner of your screen should read M200 Plus.
3. Additional models may be added by clicking the “+” button.
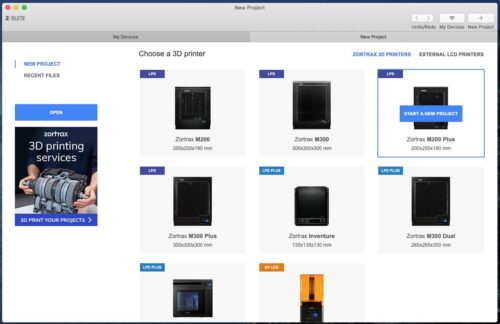
Fig 1 – Printer Selection

Fig 2 – Splitting the Model
Splitting the Model
4. Orient and size your model for printing. Generally, printing in or near the middle of the plate is best. Also, be sure to orient your model to minimize overhangs and for the easiest removal of support material. Select your model by clicking on it. Then select the appropriate tool from the menu bar on the left to modify your print.
The Move button allows you to shift the position on the plate, the Rotate button rotates the model on multiple axes, and the Resize button changes the size of the model.
Models that overlap or fall off the edge of the build plate will be highlighted in red. Models too large for the build plate may be split into multiple pieces using the Split Tool
5. When your object is oriented and ready to print, click the Print Settings button on the bottom right.
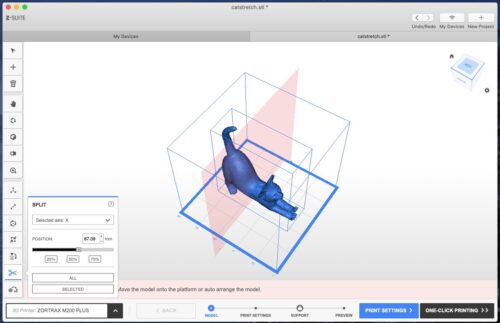
Fig 2 – Splitting the Model

Fig 3 – Print Settings
Print Settings
6. The default settings work well for most models, but there are some settings that – depending on your model – you may want to adjust.
Material: Should ALWAYS be set to Z-ABS 2
Support: Must be at least 30 degrees (the default value). The higher the angle of the support, the more support will print. Increase this angle if your model has areas that are sagging due to being unsupported. A setting of 0 degrees will print with no support material. Jobs with less than 30 degrees of support will be rejected from the queue.
Nozzle Diameter: Should ALWAYS be set to .4.
Layer Thickness: Selecting a smaller layer thickness will give you more detail, but will take significantly longer to print. Larger layer thickness will print faster but with less detail.
Quality: Should ALWAYS be set to High for best results.
Infill Density: Determines the density of the interior mesh of the model. The default value of 30% infill is ideal for most models. Jobs with lower infill will be rejected from the queue as low infills can cause instability during printing. Higher infill will take the longer to print and cost more, but yield a more sturdy and solid model if needed.
7. When your print is ready, select Preview (on the bottom right). Note: this process may take several minutes depending on the size of your print. Also, if you selected editable supports earlier, it will take you to an additional screen to make those edits).

Fig 3 – Print Settings

Fig 4 – Print Preview
Print Preview
8. When your print is ready Z-Suite will show you a preview. The blue is your model and white is support material. On the right of your screen you will see a report of your settings as well as an estimated print time.
If something does not look correct, click Back and re-adjust your print settings. If everything looks good, click Export File and then Export File again to save your .zcodex2 file.
9. Bring your .zcodex2 file on a USB stick to the Digital Output Support lab assistant in 235A, or submit the Zortrax 3D Print Request form online at:
go.illinois.edu/artZortraxRequest
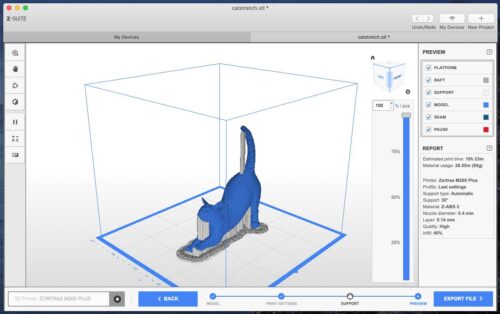
Fig 4 – Print Preview