
Fig 1 – Print Menu
Printing to Laser Printers
Before you begin: Work locally. Always start by moving your file to the desktop. Opening and printing files from a USB (or other) drive can create problems.
Navigate to File>Print. Select a printer from the Printer dropdown menu. Select one of the Xerox Printers.
(Tip: if you only want black and white output, select one of the “Mono” print queues and you will be charged the cheaper black and white rate.)
(Note: these instructions are written for Mac. Most functions in Windows are very similar. There will be notes for some steps where the process differs for Windows.)
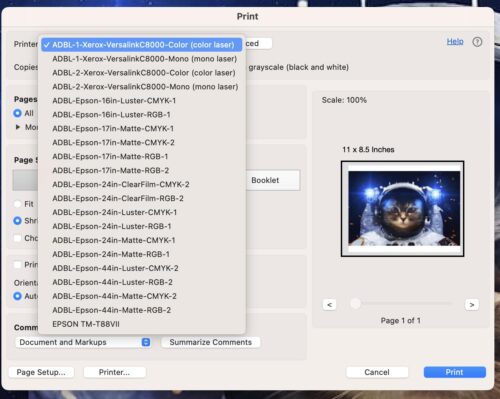
Fig 1 – Print Menu

Fig 2 – Printer… Button
Page Setup
Click the Page Setup button.
Select the printer you are using from the Format For dropdown menu.
In the Paper Size dropdown menu, select U.S. Letter for 8.5″ x 11″ or Tabloid for 11″ x 17″.
Click OK.
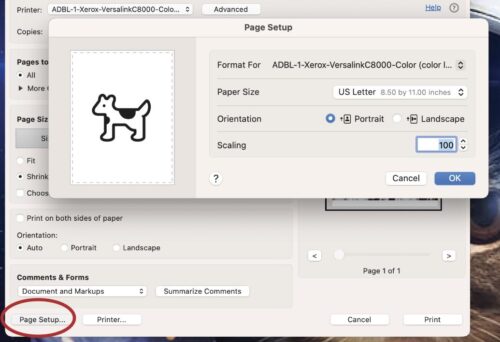
Fig 2 – Printer… Button

Fig 3 – Print Menu
Print Menu
Open the Print Menu.
Note: If printing from Adobe programs, click the Printer… or Print Settings or Setup… button to access the following settings.
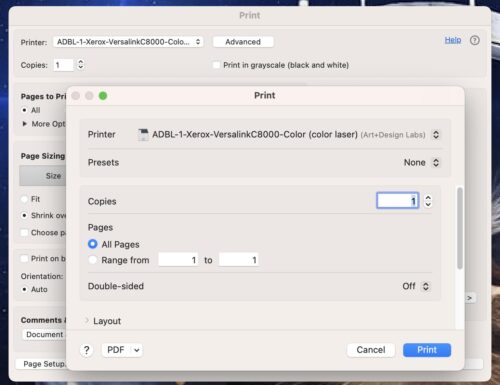
Fig 3 – Print Menu

Fig 4 – Double-Sided Printing
Printing Double Sided
Select select the desired binding method from the Double-Sided Printing dropdown. (“On” is long-edge binding)
(In Windows, use the 2-Sided Printing dropdown in the Print Settings or Properties window)
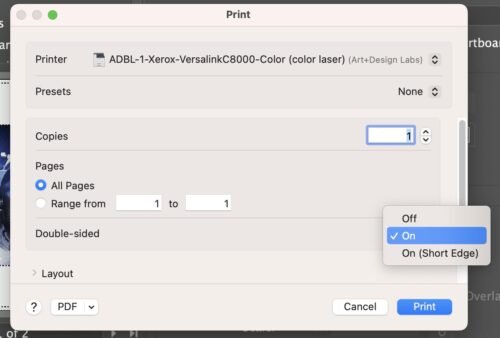
Fig 4 – Double-Sided Printing

Fig 5 – scrolling down
Printing to Cardstock and Heavyweight Paper
Scroll down to find Printer Options, and click Printer Options to expand the menu.
(In Windows, in the Print Settings or Properties menu, select the Paper dropdown, Select by Tray, Tray 1)
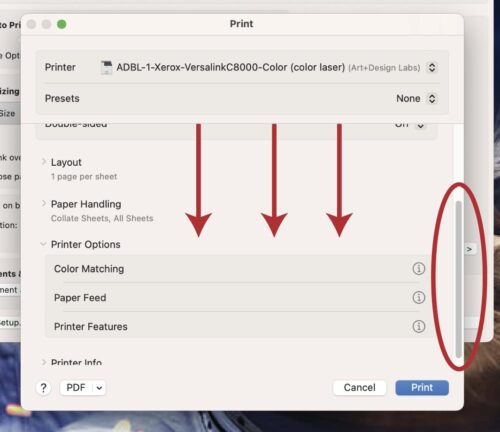
Fig 5 – scrolling down

Fig 5.5 – Cardstock selected from menu
Scrolling down
Click on Printer Features. A window will pop-up – select Cardstock from the Paper Type dropdown options.
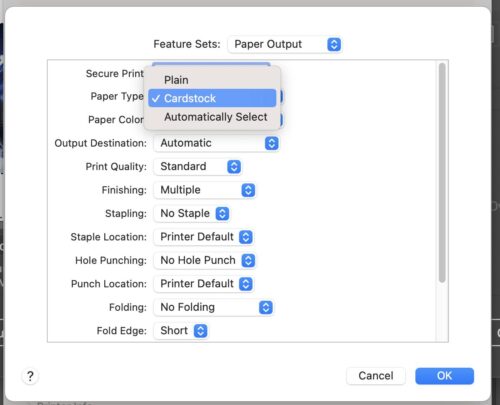
Fig 5.5 – Cardstock selected from menu

Fig 6 – Manual Feed Printing
Printing from the Manual Feed Tray/Bypass Tray
If you want to use Manual Feed/Bypass tray: Click on Paper Feed in the menu. A window will pop-up. Select the Bypass Tray from the dropdown menu.
(In Windows, in the Print Settings or Properties menu, select the Paper dropdown, Select by Tray, Tray 5)
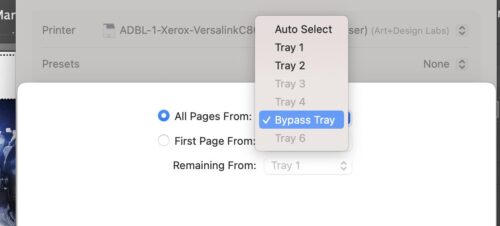
Fig 6 – Manual Feed Printing

Fig 7 – Confirm and Print
Once all of your settings are selected, click Print.
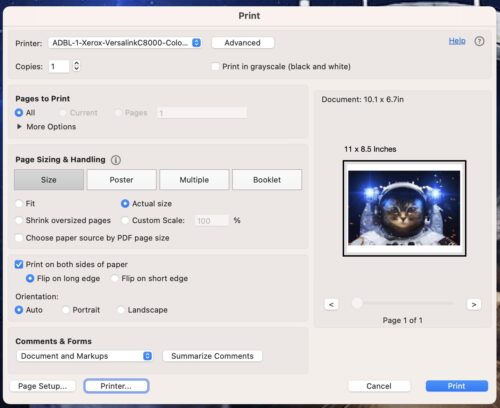
Fig 7 – Confirm and Print

Fig 8 – Papercut Notification
Papercut
When your document has reached Papercut, you will see a pop-up notification window.
Follow the releasing prints from Papercut instructions to release your print.
Remember to check the print cost before releasing the print – it can be a great indicator if something is wrong with the size of your print.
Fig 8 – Papercut Notification