
Fig 1 – Print Menu
Printing from Acrobat to Epson Inkjet Printers
Before you begin: Work locally. Always start by moving your file to the desktop. Opening and printing files from a USB (or other) drive can create problems.
All jobs sent to any lab printers (inkjet or laser) must be released in Papercut before they will be sent to the printer.
Disclaimer: Acrobat often has problems with mischarging and with the preview window not accurately reflecting the final print. When possible, we recommend printing your document from the original program in which it was created (InDesign or Illustrator or Photoshop) rather than through Acrobat. We also recommend to NEVER print PDFs through Preview.
1. Navigate to File>Print. Select a printer from the Printer dropdown menu. Choose a print queue appropriate to your file’s color space.
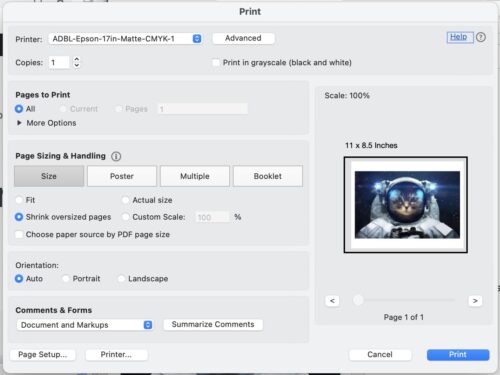
Fig 1 – Print Menu

Fig 2 – Print One Page at a Time
Pages to Print
The inkjet printers will accept only one page of your document at a time. If your document has multiple pages, select only the page you want to print under the Pages to Print heading. You will have to print each subsequent page separately.

Fig 2 – Print One Page at a Time

Fig 3 – Page Sizing & Handling
Page Sizing & Handling
Under the Page Sizing & Handling heading select Actual Size from the Size Options menu and select Portrait for your page orientation. (Do not use the portrait/landscape orientation buttons to rotate your document. It should always be set to portrait. If you wish to rotate the document, rotate it in the program in which you created the document, not in Acrobat.)
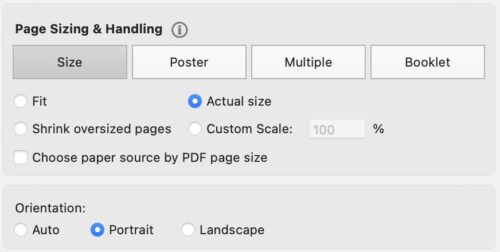
Fig 3 – Page Sizing & Handling

Fig 4 – Manage Custom Sizes
Page Setup
2. Click the Page Setup button.
3. Select the printer you are using from the Format For dropdown menu. In the Paper Size dropdown menu, select Manage Custom Sizes…
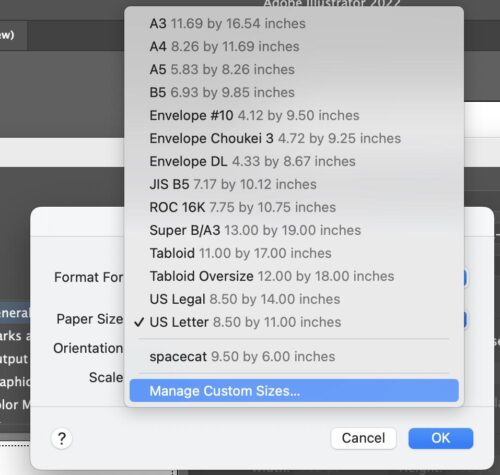
Fig 4 – Manage Custom Sizes

Fig 5 – Custom Paper Sizes
Custom Paper Sizes
4. Click the + button to create a new custom size. Title it appropriately.
Set the Width and Height to the size of your document.
Set Top, Left, Right, and Bottom to “0”.
Note: If you have chosen to print your document with printer’s marks (trim, bleed, registration, etc.) add an additional 1/2″ margin on all four sides to accommodate the marks. If you choose a paper size that doesn’t have extra margin for your marks, the printer will crop them out and not show the marks.
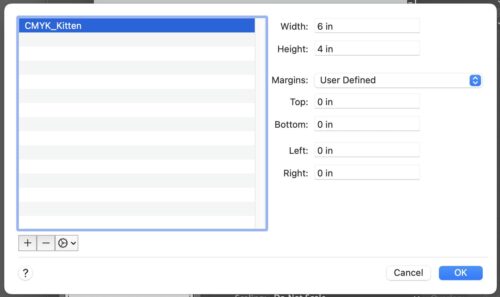
Fig 5 – Custom Paper Sizes

Fig 6 – Confirm Paper Size and Settings
Confirm Settings
5. Confirm that your new paper size is selected in the Paper Size dropdown menu and that your printer is selected in the Format For dropdown menu.
Click OK.
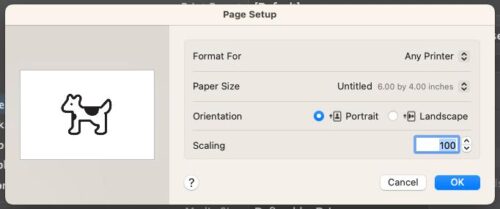
Fig 6 – Confirm Paper Size and Settings

Fig 7 – Confirm Layout and Settings
Print Menu
6. Check the preview in the Print Menu to be sure that your document is laid out correctly and not being cut off.
Click Print.
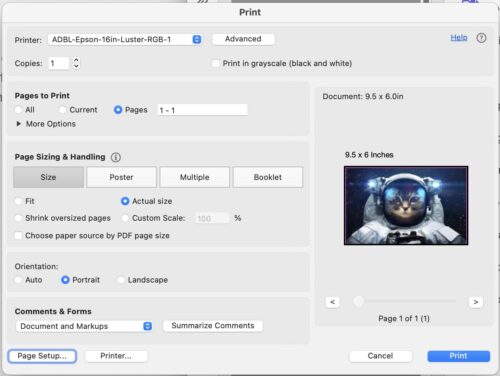
Fig 7 – Confirm Layout and Settings

Fig 8 – Papercut Notification
Papercut
7. When your document has reached Papercut, you will see a pop-up notification window.
Follow the releasing prints from Papercut instructions to release your print.
Remember to check the print cost before releasing the print – it can be a great indicator if something is wrong with the size of your print.

Fig 8 – Papercut Notification